Alterations · Sewing

Storm-Grey Kimono Re-boot

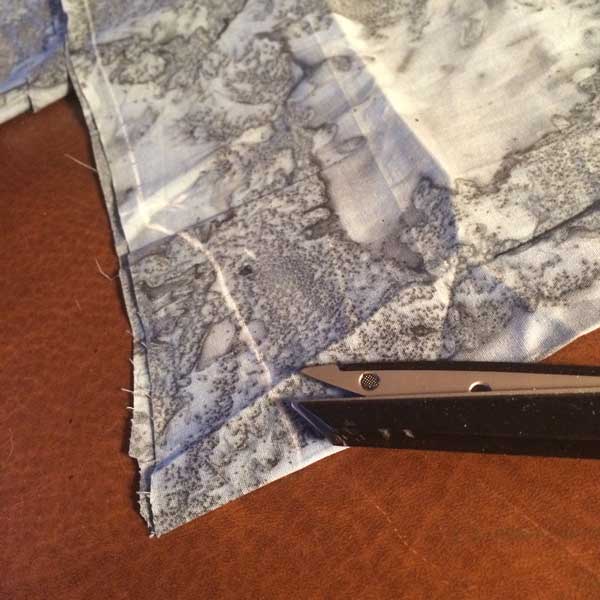
pacifickimonoIt came to me in a dream the other night!  I figured out how to fix the Storm-grey kimono and save it from being a total loss.  The ties were not lined up.  Oh, two ties were lined up and and the other two ties were lined up but it becomes painfully obvious that all four ties need to line up together.  I didn’t think I could ever move the one pair, but then it came to me that I could lengthen the collar band with some leftover scraps and re-attach the ties there.  It worked and now the kimono looks like a true Frankenstein with all of the ripped out stitches and re-stitching.  I’m hoping it will work as a backup garment. Time and a fitting session with the client will tell.

The client approved of another piece of fabric that I purchased with the kimono in mind.  It is an amazing batik that reminds me of ocean waves, both blue as water and sky should be and grey with detail and “grunge” that goes along with ocean water.  I opted to reproduce the treasured original garment rather than struggle with the ties and neck fit of the traditional one.  I laid the treasured kimono down on the ocean batik and traced the garment pieces using a white chalk marker and a bar of soap.  I added seam allowances as I went.  Being able to reproduce a favorite RTW garment is an acquired talent.  I have finally mastered it, I think.  Time, and fitting, will tell in that situation as well.
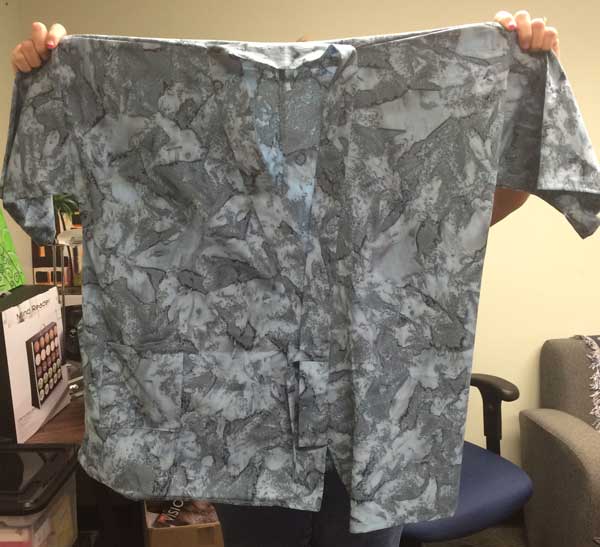
pacifickimono2Introducing, the Ocean-blue kimono.
Sewing · Uncategorized

Pearl Snaps and a Pivot FBA

I grew up near a farm as a tomboy so boots and western clothing were the norm.  As I’ve grown older, I’ve never lost the love for either.  A recent stint of line-dancing re-ignited my passion for a well-fitting pair of boots and an ornately decorated yoked western shirt.  After reading a blogpost in which the blogger was mashing up a modern-styled western shirt for herself, I set my mind to making myself a shirt with decorative yokes and yes, pearl snaps.

I ran across this fabric and it screamed, “Buy me! I’m born to be a western shirt!”.  The selvage says it is part of the “You Go, Girl” line.  ‘Nuff said.

Unfortunately, western shirts are no longer in “vogue”, at least not in the Big 4 pattern companies so I was forced to dig into the pattern stash.  I ferreted out McCall’s 7955, a man’s western shirt with yoke variations, circa 1995.  The largest size, XXXL, was still a little too small for me so I cut the shirt fronts out with a full bust adjustment (FBA) using the pivot method.  And it would have been wonderful………until I discovered that I had neglected to adjust the yokes as well.  I didn’t discover it until sleeve construction and at that point, there was no going back.  Refusing to trash the whole shirt at this point, I creatively re-drew the armscye to catch the edge of the yokes.  After all, I had applied gold braid to the yoke and nothing with gold braid trim can be deemed a mistake, right?

No western shirt is perfect without pearl snaps, but alas, pearl snaps are as scarce as a modern western shirt pattern.  I found a seller on Etsy, Cowgirl Snaps, whose variety of colored snaps makes my mouth water and my creatives juices flow with visions of western shirts to come.  I completed the shirt with gold braid shining, wickedly incorrect armhole in place and pearl snaps proudly adorning the front and ran to put it on.  I wore it out the next day with a denim skirt. Despite the errors, the shirt fits well……slightly large and boxy as I would expect a man’s shirt to fit but I’ve always liked menswear fit.

And let me just say, pearl snaps make everything better!

Sewing

My First Frankenpattern: the Storm-Grey Kimono

I was asked by a co-worker at the day job if I could recreate a favorite garment.  It seems the co-worker’s significant other had purchased him a casual kimono while on a trip to Japan.  The garment had become a treasured item and has been worn almost daily.  He wondered if I could make him some more exactly like it with a few minor adjustments.  I always like a challenge and have an interest in Japanese garments so I agreed.  Sure, I thought, I should be able to do it.  My research led me to this book, Make Your Own Japanese Clothes: Patterns and Ideas for Modern Wear.  I borrowed this book from my library and found it to be an invaluable resource. Unfortunately, the publisher has closed their doors.  On mentioning the book, the client agreed to purchase the book for me as a down payment.  Happily, I agreed and received the book a few days later. The client brought me the beloved kimono, gave me precise instruction on fit, and suggested preferred fabric colors and weight.

After careful study, I found that the kimono is in fact styled in a very Americanized manor, not like traditional Japanese garments.  It has shoulder seams, a narrower collar width, and shaping more akin to American menswear.  “Frankenpatterning” was my best idea at the time.  I used traditional Japanese methods of patterndrafting from the book but used the client’s measurements. The book is excellent for assisting with patterndrafting but it lacks the construction detail that I am accustomed to seeing in sewing patterns, in particular location and construction of the self-fabric ties.  Considering myself an intermediate sewist, I constructed the new kimono in a storm-grey cotton.

The resulting kimono was beautiful on a clothes hanger.  The client was pleased with the color and the fabric weight.  It was after the client tried it on that my mistakes became horribly obvious.  Two of the four self-ties did not match up resulting in a front that gapped and was unwearable.  I could not in good conscience let anything that looked that bad leave my studio.  Another co-worker agreed the fit was indeed “horrible”.  So I’m going back to the studio with the original garment in hand and the intentions of drafting a pattern based solely on the treasured kimono while planning on another pattern mashup adventure in the near future.

Sewing

Digital Stash Management

I am a late baby-boomer, but I am an information specialist working in a progressive academic library.  So I’m more “millennial” than many others my age.  I get that. I am also an avid sewist, manic knitter and occasional crocheter.  If it involves a needle, I’m there.  I am tired of living in two completely separate worlds!  When is the sewing industry going to get a clue?  

There seems to be a huge sewing revival among the younger generations – the generations that do not go anywhere without their smartphone and know all the free wifi spots along their route.  They are blogging and posting to all forms of their social media about their sewing adventures.  So do you mean to tell me that they have fabric scraps taped to index cards  and photocopies of their favorite patterns in their purses when they go shopping?

I long for a means to create a digital stash……..something where I can have the patterns I own and the fabrics I own all managed in a website or better yet, a smartphone app.  I’ve been researching this.  I can’t seem to find that anyone uses anything.  The couple of apps that I have looked out are very problematic and don’t get the job done.  I’m currently testing one idea……more to come.

Alterations · Bags · Sewing

Altering a Purse Strap

Altering a Purse StrapIt is 4th of July week and I felt the need for a new purse.  I found a pretty snazzy, all-American one but it had a short faux leather strap.  I can never find purses with ample straps for my ample body.  Then it hit me.  I can sew!

As a quilter I have a stash of leftover quilt binding from previous quilts.  I dug through that bin and found this red fabric with blue and white stars.  Perfect.  The existing strap on the purse was narrow and matched the width of the binding perfectly.

  1. Using a seam ripper, remove the existing strap from the hardware, leaving the existing hardware in tact.
  2. Open up the folded quilt binding strip.  Mine was 1 7/8″ wide when folded.
  3. Fold the unfinished fabric edges of the strip in to the middle fold and finger press.
  4. Topstitch with a machine along the long edge of both sides of the strip.
  5. Thread the ends of the finished strip through the purse hardware and adjust the new strap to the perfect length.
  6. Tuck the unfinished ends in on themselves and loop around the existing hardware.
  7. Stitch the ends in place using a sewing machine.  Stitch back and forth several times for added security.

Voila! New purse with custom strap that always fits.


Purses · Sewing

Murray State Caps – My Version

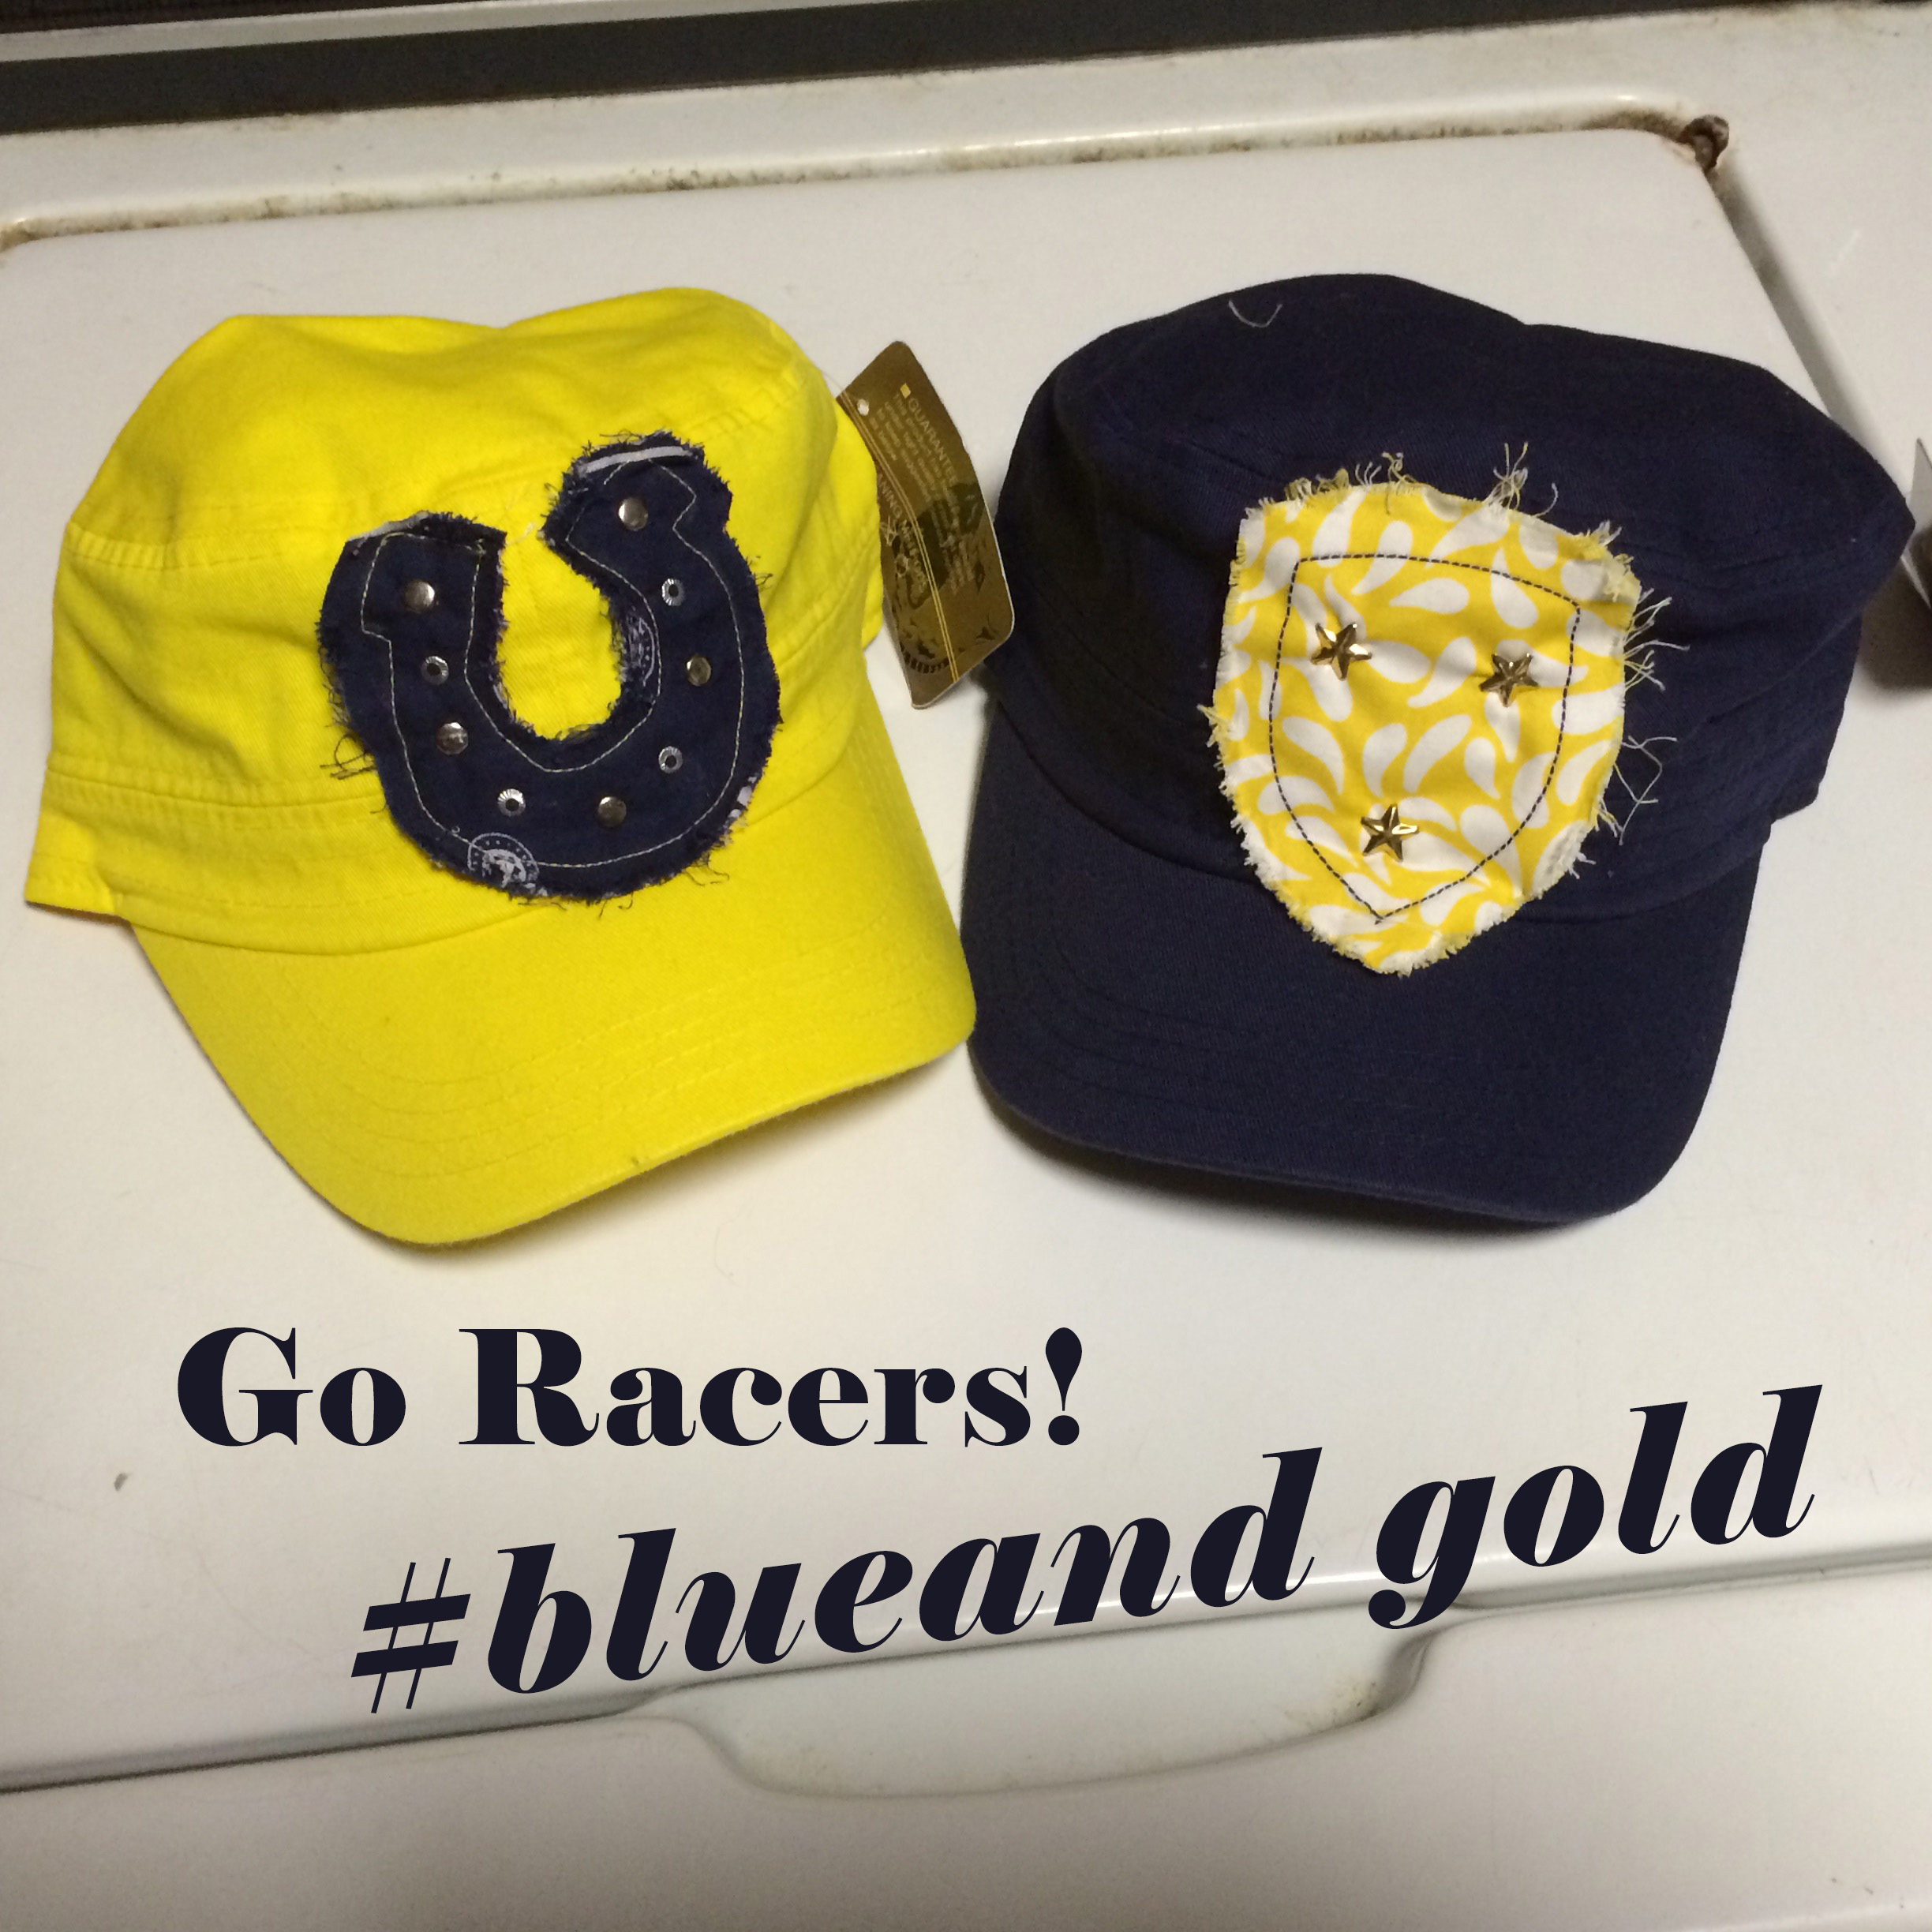
IMG_1524One of the latest fashion fads in this little college town is m0nogrammed baseball caps.  Girls are keeping the embroidery business hopping by asking for baseball caps with a round or square monogram on frayed edge appliques.  One sewist is selling a lot of caps with the state of Kentucky appliqued on a cap with a heart embroidered over our small town.  Cute!  But I wanted my own version.  I had these cadet caps in my sewing stash for just such a purpose.  A friend’s birthday was this week so it was the incentive I needed to get these puppies done.  And I think they turned out exceptionally well, if I do say so myself.  Both of them found very good homes so I’m pleased.


One regret:  I forgot to put one of my labels in them.  But I did sign and date them with a sharpie.

Sewing

My Very First Label

10291267_518727338227539_2001256388388161428_nWhen I finally decided on a brand for myself and my creations, the first thing I wanted to do (after acquiring the services of a graphic artist) was to create my own fabric labels for my handmade items.  I sent my shiny new professional graphic image off the an Etsy vendor who crafted me my very own rubber stamp of my brand.  I love it.  And then it went in a pile in the sewing room and has been forgotten.  I sewed a few gifts, gave them away and had some regret they didn’t have my label.  But not enough regret to motivate me to dig out the rubber stamp.  I put stamp pads on my craft store list and finally purchased some cheap ones.  I recently stitched up a very cute little baby snuggle wrap for a baby shower gift and had to physically force myself to dig out the stamp, stamp some fabric, heat-set it using the method described in Crafty Blossom’s blogpost.  I made so many excuses on why this wasn’t going to work.  I don’t understand why it is sooooooo hard to do.  It must be fear.  Anyway, I have stamped and sewn in my first one.  The house did not burst into flames, I did not get struck by lighting and the baby swaddle blanket or label did not spontaneously combust.  So………it will be easier to do next time and as I get more comfortable doing it, I want to eventually design a yard of fabric labels at Spoonflower as in these instructions at Things for Boys blog.


Goal:  label everything I make!

Alterations · Sewing

Generation We and Working With Their Hands

While scanning my Twitter feed, I ran across this article re-tweeted by HootSuite concerning Millennials and the social media skills they lack. I had not heard the Millennials referred to as Generation We or Generation Me but I find that it is an accurate description. Those born between 1980 and 2000 have:

predispositions of Generation Me – idealism, entitlement, a need for instant gratification, and recognition

I find that many have no desire or need to work with their hands.  I wonder if that is a result of needing instant gratification. I’m sure there is no large media splash of recognition for having completed a hand-knit scarf or sewing an adorable baby bib or quilting a lap-quilt.  In addition to social media skills, my informal research has found that they do not know how to thread a needle, replace a button, or hem their pants.

I have stumbled upon several of this generation who have discovered they lack these skills and are interested in acquiring them.  I was a tad surprised, thinking this generation born of YouTube would simply Google anything they wanted to learn and be fine.  But they don’t want to do that.  They want a real, live person to instruct them, be in the room with them and lead them from beginning to end in a project.  The sad thing is there are not many of my generation (late Baby-Boomers) who learned the skills themselves and all home economics programs were eliminated in public schools long ago.

Thus, I am in the middle of planning a (Very) Basic Alterations class that is not my true definition of an alterations class.  This class is a combination of beginning sewing-threading a needle, tying a knot, sewing on a button; hemming-shortening or lengthening pants, shorts, dresses, skirts, tops; and shopping for the correct size clothing online.


Should be interesting.  Maybe they will come.

Alterations · Sewing · Tools

My First Seam Gauge (After 40+ Years)

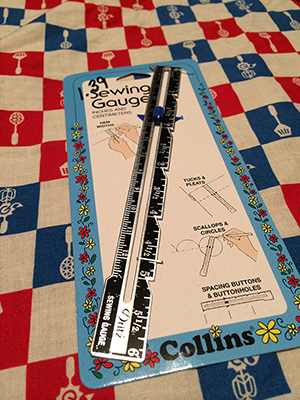
gaugeI must be the McGyver of sewing. I’ve learned to take whatever is available and adapt it to my needs at that moment. Lack of resources, both financially and geographically, have always dictated that I work with whatever is on hand. This is a skill that is lost on the younger generations of today, by the way. Therefore, I do not always use the proper tool. I make do.  This weekend, I made the decision to buy myself the proper tool for sewing and alterations: the seam gauge. Wow, what a splurge!  The ultimate decadence–to drive to the sewing notion store and shamelessly purchase the proper tool without consideration of the financial burden to my family, the effect on the environment or the starving children in Africa!

I’ve been sewing for 40+ years and I’ve never owned a seam gauge.  I vaguely remember one at the age of eight in a Girl Scout sewing kit but I must have lost it shortly after possessing it. What possessed me, you ask?  I have several requests to teach an alterations class in writing the lesson plan, I keep coming back to the use of a seam gauge.  As I gathered up my tools, I was embarrassed to see what I have been using instead:  an old plastic 6inch ruler supporting the Future Farmers of America, an old plastic 12inch ruler from a food salesman with the Kraft brand on it, a similar ruler from the AMAX coal company, a child’s ruler left behind at Vacation Bible School and yes, on occasion, I have been know to use a dollar bill.

Who knows what I will be able to accomplish with the “proper tools”!

Sewing · Tools

Mobile Sewing Center Of My Dreams

2014-03-21 15.14.08I have found the perfect mobile solution for my sewing needs!  Thanks, Happy Zombie, for your blogpost.  I’ve searched high and low for some sort of storage and travel option for my treasured featherweight and associated sewing notions.  My husband’s shopping gravitates toward sporting goods stores and home improvement centers so I tend to make the most of it and do some creative re-purposing  that I’m sure would surprise the tool makers.  I had not noticed the Stanley-3-in-1-Rolling-Workshop until your posting.  “Walt’s cherry new ride” is indeed perfect.  If Stanley were smart, they would market a version in the sewing and quilting industry.

2014-03-21 15.24.43My as-yet-unnamed, treasured 1946 featherweight slid down in the bottom like it was made for it.  I had tried to find a way to jettison the original 1946 box because of the extreme weight and molded mildew smell that was embedded in it.

All my tools fit in either the compartment tray with the bright yellow lid or the sliding tray in the top toolbox.

The handle is very functional. I was not a fan of the telescoping ones but this one seems very sturdy.  The upper toolbox is so spacious that it inspired me to whip up a quick iron cozy since my iron had plenty of room to ride in the box.

This rolling workshop, coupled with the portable folding cart that I received for Christmas have allowed me to take my sewing “on the road”.  I stuck a large cutting mat, ruler and small ironing board in the portable cart along with fabric supplies.  I rolled into teach my first Learn To Sew Class without the need of multiple trips to the car to pack in multiple boxes of class supplies. I feel confident that I can sign up for any workshops that require a sewing machine now without fear.

Now, I need stickers….some sort of creative embellishment…….’cause that is how I roll! LOL