Tips

Google Calendar for Creative Entrepreneurs

Being a creative entrepreneur is difficult. As artists making a business out of their art, we have several things that need our attention all at the same time.  It can be overwhelming. I have blog posts to write, social media photos to post, new patterns to design, Etsy store items to list and, oh yeah, I also have client requests to create.  One to-do list does not cover it all.  Experts advise us to be organized to be successful.  These same experts advise us to be timely and post items regularly.  They also advise us to maintain an editorial calendar for our blogs and plan our postings on all our platforms.  Suddenly, I find myself spending all my time struggling with what to do next.  Then, one morning at the day job, it hit me. Use Google Calendar which comes with every Google Mail (Gmail) account!

In my job at an academic library, I manage multiple calendars…….and by multiple, I mean 3 calendars that I manage as well as edit another dozen or so.  Those are in addition to my own 3 personal calendars.  We use Google Apps on campus, specifically Google Calendar for everything from building operating hours to meetings to campus events.  So, why not apply the tools I use for those calendars to my personal creative endeavors? And it’s free!

So here is a short tutorial on how I use Google Calendars to corral the many tasks I have on multiple to-do lists.

  1. Capture1All of my email, calendaring and documents, both personal and professional, are in Google.  I find the apps to be among the most powerful in the world.  Their integration into each other and sharing capabilities are beyond compare. All my info is stored in the Cloud and accessible across all my devices.

    From a Gmail window, the Google Calendar can be accessed by clicking on what we quilters could call the Nine Patch block located next to the gmail account name in the upper right corner.  The dark grey square of nine grey blocks is Google’s universal link to their Apps.
2.Capture2 Clicking on the Google App “nine patch” expands a drop-down menu that displays nine of the most commonly used Google Apps.  Calendar is one of these.  Clicking on Calendar will lead to the Calendar app.  The calendar that displays is referred to as “My Calendar”.  I use it for all of my appointments, events, and anything else that must not be missed. My Calendar will be my primary calendar and will always display for me.

3. I create an event by clicking on the date and time and filling in the event info.

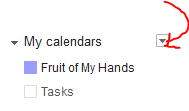
4. Now, here is where the fun starts.  Notice that on the left pane of your screen under My calendars, there is a list of calendars.  By clicking on the down arrow (marked by the red arrow in the pic), additional calendars can be created for other things.
Capture10

5.  I have a tendency to neglect blog posting so I sat down and made an editorial calendar.  (It is recommended by the experts.)  So, in Google Calendar, I clicked on the drop-down arrow and chose “Create a new calendar” which led me to this screen.

Capture11

I named the calendar “Blog” and created events in it for every blogging task that I thought I needed to accomplish.  I chose “Repeat” and set up repeating events for any posts that I want to post regularly.  TipTuesday, New in the Etsy Store, and Tools are examples of regular posts.  I can quickly at any time open up the event either on a desktop or my phone and add the topic or notes for the posts.

6. I forget to manage my Etsy store items when I am focusing on blogging.  So I created another calendar and named it “Etsy”.  I filled it full of my plans for my store. I make events for the items that need to re-posted or updated or added.  (I have a tendency to upload all of my Etsy items at once which keeps them from getting noticed.) I’m using All Day events for now.  I will analyze my statistics at a later point and assign the best times during the day for those postings.

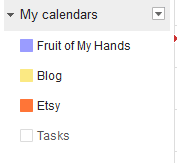
Now back to My calendars. I change the coloCapture13r setting to each of the calendars so the tasks are distinguished by from each other. Now doesn’t that look much neater? or cooler?
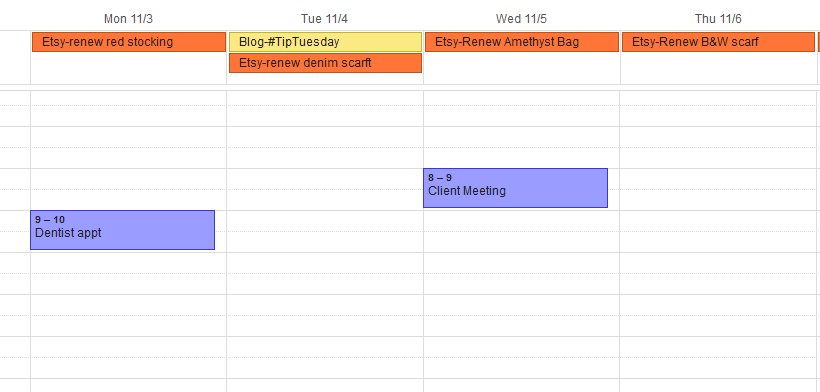
 

Capture14


7. Each calendar can be shared with someone else so that I can have some assistance.  If a friend is interested in doing some blogging for me, I can share the Blog calendar with them and they never see all of my personal appointments.  At work, we collaborate and agree on a plan for upcoming events and establish themes for postings for that month.  The editorial calendar is then shared with all of the team members.  It is very helpful to have the whole team on the same writing schedule posting along the planned theme.

Share one of the calendars by clicking on the drop down arrow to the right of the name of the calendar in My calendars.  A screen similar to this will appear.  Provide the email (I believe they have to be Google mail accounts) of the person offering assistance and set the level of permissions for them.  Google will send them an email advising them of the sharing.

Capture112

Tip:  I share all of my calendars with all of my email accounts so that when I have thought, I can pop open the nearest calendar window and apply whatever ideas I have.

Now I have my creative entrepreneur plan for the next couple of weeks, but I don’t have any of this shared with anyone that could help…….hmmmmm, now to find some sucker to take on the huge task of assisting me be me……..
 

Uncategorized

Special Olympics-Ky Scarf Project 2015

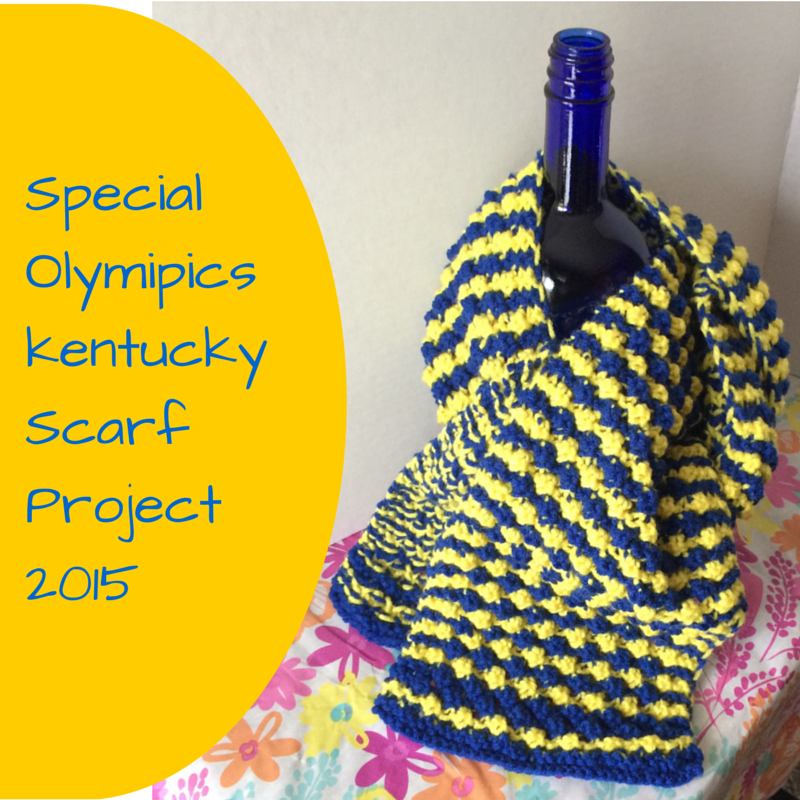
SOKY15I believe my talents are a gift and I should give back whenever possible.  I’ve tried to make an effort to participate in the Special Olympics Scarf Project for several years.  I missed a couple of years.  This year, I was fortunate enough to run across the new color announcements for my state early enough that I could put a scarf on my crafting schedule.  This year’s Kentucky colors of Royal Blue and Yellow Red Heart Yarn were readily available enough, some even coming from my mother’s stash.

I see the SO-Scarf Project and other charitable crafting programs as an opportunity to both give back AND try out new techniques, new stitches and new patterns.  I know there are those knitters out there that look down at those that use the less-expensive acrylic yarns but I will use whatever my hands find to use.

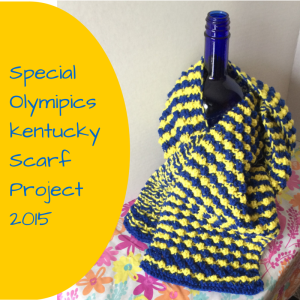
Here is the 2015 scarf for Kentucky in the chosen colors.  I had another pattern that used a raspberry stitch for the scarf so I took that pattern and adapted it to a two-color stripe scarf that fit the requested dimensions of 6″ wide and 54′ to 60″ long.  I learned a new stitch and have provided a treasured item to those working the SO games.

Do you participate in charitable knitting projects?

For more info on the Kentucky Scarf Project:
Special Olympics Kentucky Scarf Project
Special Olympics Kentucky’s Facebook page

Sewing · Tips

Tips for Fabulous Fabric Photos for Sewists

FABULOUSAs a #Sewcialist, it is inevitable that at some time in the future, I’m going to snap a pic of some fabric. It will be a fabric find that I want to share with my fellow sewists through my many social media platforms. Sewists often share photos of fabric. It might be a bargain find from a local fabric store or just the random yardage of the day from our stash.

Being a sewist does not mean we are all professional photographers. Learning to be a professional photographer would deprive me of precious sewing time. So, I searched the internet to find some tips and tricks to help me in my future postings and here is what I found:

  • No training is required. One only has to remember a few tips when taking the photos to achieve a nice photo.
  • No special equipment is needed. Many of the social sewists I envy are amateur photographers while focusing all their time and energy into their sewing. They are not professionals with photography studios and elaborate equipment.
  • No special camera is needed. Let’s face it, we all can not afford the latest digital SLR camera. I had a simple automatic digital camera and I can honestly tell you, it was never with me when I needed it. If I had an expensive camera, I can guarantee I would want to keep it in a safe place and that would not be over my shoulder or in my car. What do we all have in our hands? Our smartphones! Many of us use our camera on our phones to snap pictures of our fabric. These pictures can work. Today’s camera phones take much better pictures than last year’s automatic digital cameras. The smartphone also has photo edit capabilities that are good, along with plenty of free photo editing apps.

So when faced with a fabric that I simply must share, smartphone in hand, here are some things to remember:

  1. Light – Many of us don’t have the space or the money to create a white-box with lights. Natural light can be used for good photos. When at home, look for rooms in the house that have the most windows and allow in the most daylight. A single large window can work. Place your fabric near the large window out of direct sunlight. It doesn’t matter if it is in the kitchen or bathroom. On cloudy days, a large piece of white poster board or foam core board can be set up next to the fabric to reflect even more light. Photos can be made outside on a patio or deck as long as direct sunlight is avoided. Direct sunlight ruins any good fabric photo. The strongest light should be behind the camera. Caution:  with the light behind the camera, the light will be behind you so watch where your shadow falls. (We don’t want to see the outline of you in your jammies ……because that is what we all sew in, right?)
  2. Backgrounds should be considered if the fabric swatch is not filling the entire photo frame. Choose a complimentary background that will not clash or draw away any attention from your focal item.  A solid wall of neutral color works best.  Busy backgrounds make it difficult to distinguish the outline of your item. (The messy pile of fabrics in the background will draw my attention away from the single jersey print you couldn’t live without.)
  3. Interest – Add objects to the photo to provide followers with more information. If the fabric is intended for a specific pattern, place that pattern in the photo with the fabric and capture it as well. Tell the story with the picture, not just the accompanying post or comments. Sparkly fabric could include the bangle bracelet or clutch purse that was the reason you purchased the piece. The perfect apron fabric photo could include a cookie-cutter or cookbook. In one glance, we know everything that we need to know about your plans for that fabric. (It makes it easier for us to click “Like” because it is obvious that you were a genius in your choice.)
  4. Angles – Angles are an important part of both lighting and interest. I feel they are important enough to be mentioned separately. Things are viewed differently from different angles. Take the photo from different angles other than the straight on, direct approach. Light from different angles will highlight any texture in the fabric. These textures would not normally be seen when photographed straight on. ( I know it is hard but try sitting on the floor, standing on a chair or bending to the side at an angle your chiropractor would not approve. See if it makes a difference in your photo.)
  5. Wrinkles – This is the biggest complaint of many fabric artists. I know it will take a few more minutes and yes, it might dampen your glee a little, but we want to see your fabric looking its best. (Think of the credibility it will gain you in the sewing community. Not only do you take good photos and select awesome fabrics seams but you prove that you know how to operate an iron or garment steamer.)
  6. Out-of-Focus – Our smartphone cameras are all auto-focus. Yes, they will focus and provide a clear, crisp photo if we will but wait for auto-focus to do its job and if we will stand still. Point your camera at the fabric, tap the auto-focus and take a deep breath. Then snap the picture. (If you are like me and the pressure and excitement is too much for you, place the camera on a solid surface to avoid any shake of the camera.)
  7. Try some collages – This is my original idea. Use some of the wonderful free photo-editing apps to create a collage. I like PicStitch and Pixlr Express. Frames of the collage could contain a picture of the fabric, a picture of the pattern and a picture of the selected buttons or trims. One frame could include you in the finished garment, if you can wait for posting that long. (Next time you find yourself waiting in line and playing Angry Birds, flip open a photo-editing app and your image library. Create some photos that will represent you and your aesthetic better in social media.)

I am in no way a professional photographer,  I’m not even a good amateur photographer.  I try to find information that helps me and I want to share it with others.

Further reading:
Tips from Spoonflower designers: Berene Campbell on how to photograph your fabrics
Tips from Spoonflower designers, Pt. 2: KristopherK on how to photograph your fabrics

Uncategorized

“Hypoallergenic” Knitting

Is there such a thing? What does it mean? Am I one?……After some research, yes, I am a hypoallergenic knitter. Am I happy about it? Yes and no. But it does answer a lot of questions I’ve had and it also nixes a lot of plans I had.

Due to the dear daughter’s wedding, I’ve had to postpone sewing for a couple of weeks and find stress relief working with more portable fiber projects.  I’ve been knitting and crocheting like a fool.  I find myself drooling over the brilliantly-colored hand-dyed yarns that can be found on the Instagram posts of YarnInk, Handspunstagram, Vividyarnstudio and Hauteknityarn, just to name a few.  I have dreams of so many projects that can whipped up in the soft superwash merinos.  I’m hesitant to try them. Superwash merino is wool.  Many years ago I discovered I have a problem with wool.  It makes my palms swell, itch and become very painful.  So I assumed I was allergic to wool.

Working at an academic library, I proceeded to conduct some research into the subject of wool allergies.  Many blog posts stated that a wool allergy is rare and can be avoided by knitters by switching to alpaca fiber which is much less irritating to the skin.  So as a scientific experiment, I rounded up some alpaca and proceeded to knit up a pair of wristers for the wedding photographer.

Two hours into the project, I decided that I must finish the wristers in one sitting because I did not want to ever pick up alpaca again.  The alpaca fibers stuck to every surface that was exposed to them, much worse than the dog hair that is a continuing problem in my house.  My neck, which seemed to be catching the alpaca hairs flying around, broke out in a rash.  The inside of my throat became raw and irritated.  Yep, I must be allergic to alpaca.  So back to the research.

Further study revealed that anyone allergic to animal fibers should turn to plant-based fibers for their yarn projects.  (There goes every hope I ever had of visiting the Southern Animal Fiber Festival!)  After a couple of clicks on sources of cotton, silk, bamboo, and hemp, I noticed that some commercial yarn sites place these fibers in a “hypoallergenic” fiber category.  So, thus, I am a hypoallergenic knitter.  Who knew there was such a thing?

Gone are my hopes of knitting with those brightly-hued hand-dyed fibers.  It seems that gorgeous hand-dyed color is  something that is more easily achieved on animal fibers and is very, very difficult to accomplish in plant fibers.  One must search far and wide to find the couple of vendors that offer a dyeable hypoallergenic yarn that has a more yarn-like than twine-like feel. Hand dyers of those yarns are even fewer and far between.

So, here I am 2 days later and all my hopes are dashed of ever knitting beyond acrylic and cotton.  Bamboo and silk are also nice but are a slicker fiber than I want.  Hmmmm, my state just legalized the growing of hemp…..perhaps I could be a trailblazer in dying that fiber?  But who would buy it and who would want to use it? I’m willing to bet there are not many hypoallergenic knitters out there.

And, I have this crazy rash on my forearms.  I’m thinking the alpaca has not had its last say.

Further reading:
What is a wool allergy?
Winter and Hypoallergenic Yarns


Sewing

Ravelry for Sewers?

Ravelry buttonI’ve had a Ravelry profile for a while now but I only used Ravelry for searching for free patterns.  I’ve been inspired by some of their recent Unraveled blogposts to flesh out my profile and actually participate in the whole yarn community.  And let me just say, it is awesome!  The functionality of the entire website is outstanding!  The sewing community needs something like this desperately.  I wish there was some way that Ravelry would make the code open source and someone with a less than genius programming knowledge could go in and brand the site and get something rolling for sewists……….I would love to but I have a day job. LOL

Now that the dear daughter’s wedding is over, I can go back to some major sewing.  Thank goodness for yarn projects getting me through the stress of that event.

Sewing · Tools

DIY Pattern Weights

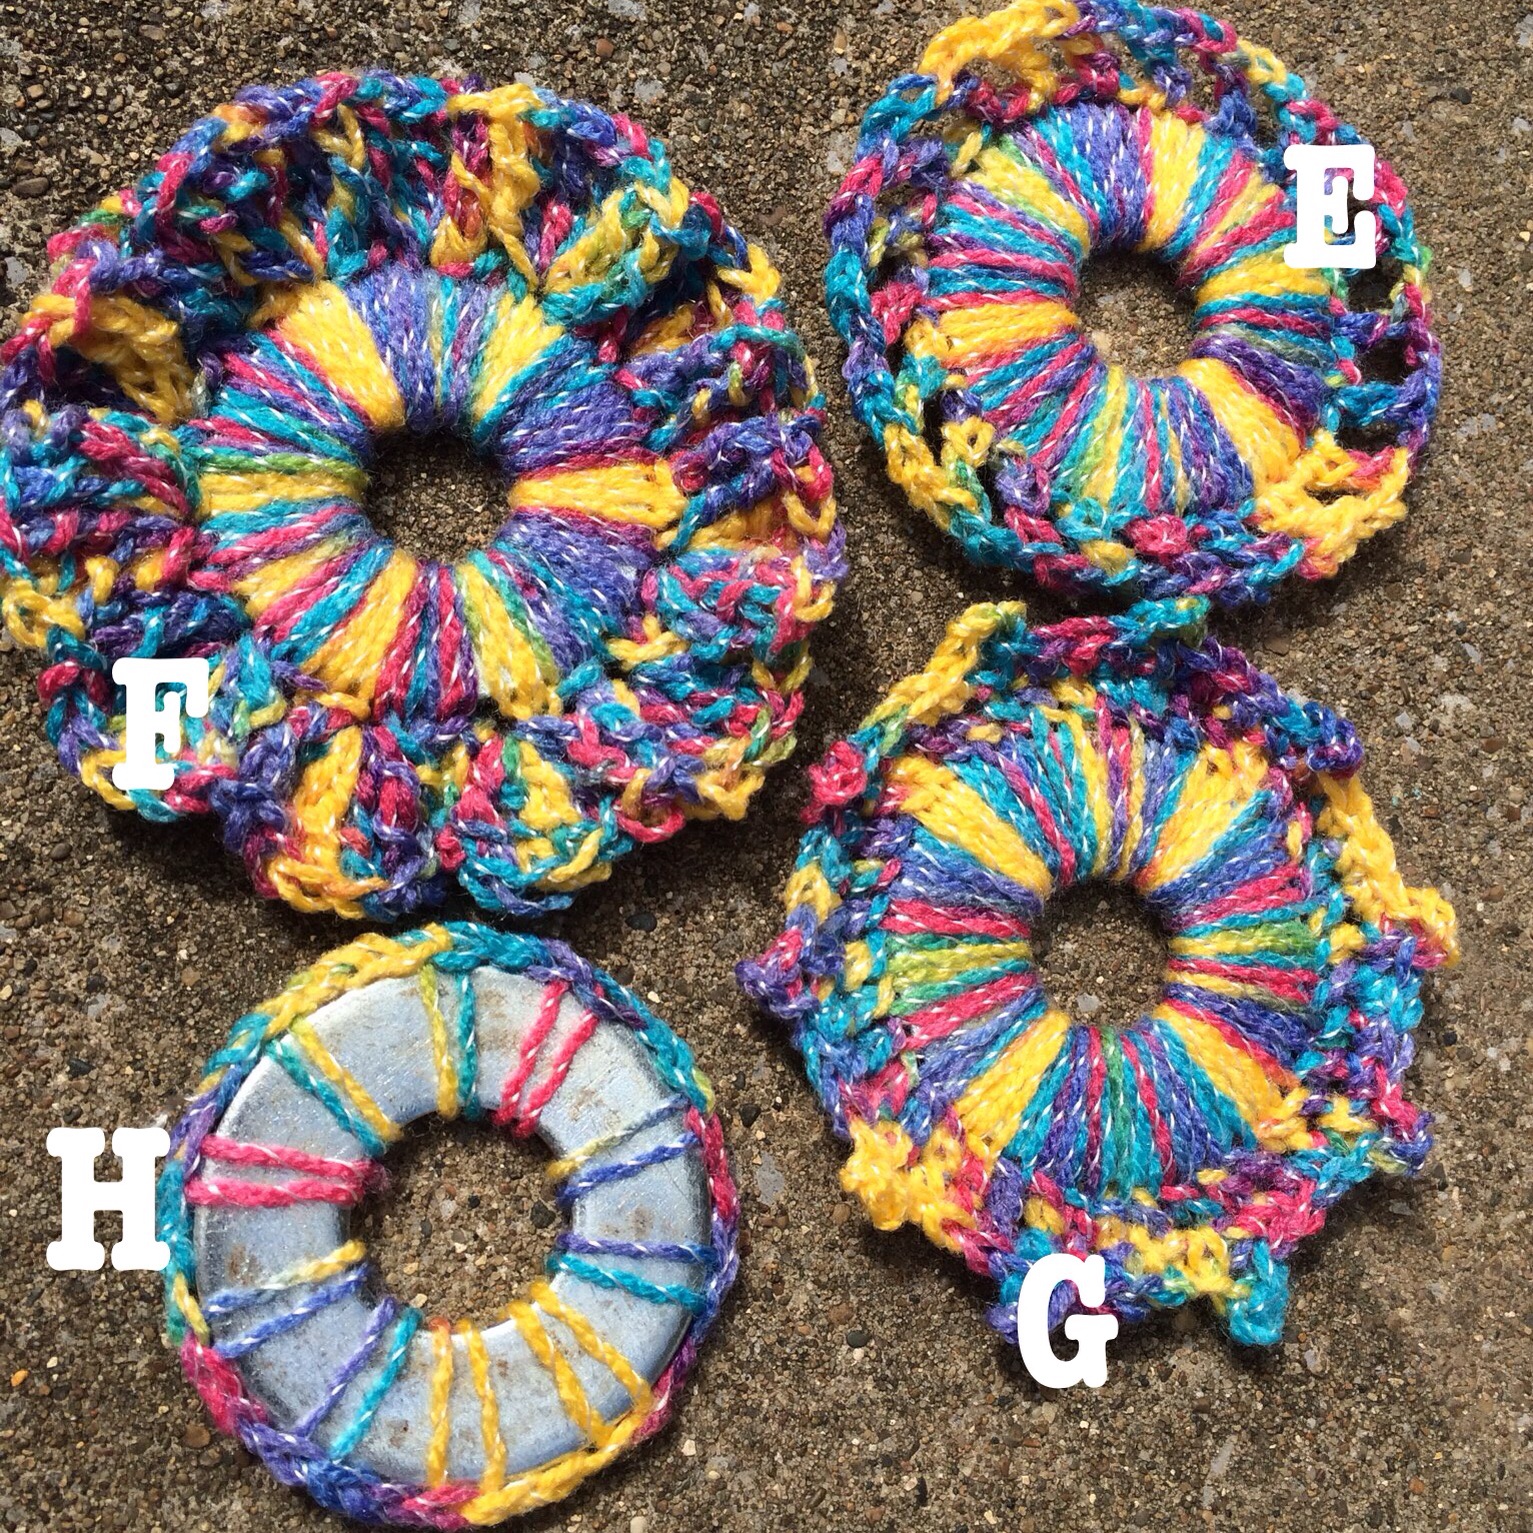
IMG_1625.JPGPinterest strikes again!  I’ve been noticing lots of pins with instructions on how to make your own pattern weights.  Pattern weights have always been a frivolous tool that never really found a place in my sewing tool budget.  Then, I saw the extremely large washers from a hardware store that appeared in my Pinterest feed one day.

Wow, what a great idea!  I wish I had thought of it.  Those washers were giant and would make perfect pattern weights, but were they available locally?  They look like washers that would fit on a oil tanker or dump truck with a hauling capacity about the size of a small town.  My husband was recounting his latest trip to his favorite farm and home store when I remembered to ask him if he had seen any large washers.  “Yes,” he announced confidently, “I know exactly where they are. I can show you.”  So on our next outing, I followed him into the store and he pointed out the variety of washers to me.  Yes, they did indeed have some extremely large ones.  The box said 1″, $1.99.  I was shocked at the price until my husband rolled his eyes and informed me, “That’s a pound, silly.”  I quickly selected eight, which I thought to be a reasonable number.  The eight washers weighed a little under one-and-a-half pounds and cost me a grand total of $3.39.

The shiny surface of the washers seemed to be slick and I was concerned that they would slip around on fabric and pattern paper.  I never miss a chance to decorate mundane things so I quickly whipped out a crochet hook and scrap ball of yarn.  Deep in my crafting memory, I remembered crocheting around canning jar rubber gaskets.  The same technique could be used to decorate these washers and give them a personality.  After a quick search of Pinterest for crochet edgings, I felt confident I could “dress” my washers and turn them into pattern weights that would be useful as well as attractive.

Once I got started, I couldn’t stop. I created 8 different designs.  I’ve included some rough pattern instructions below. (Be kind. This is my first time writing my patterns down.)

INSTRUCTIONS:  Using an H crochet hook and a ball of sport-weight worsted yarn, I started with a beginning loop on my hook and single crocheted all the way around the washer with a slip stitch in the beginning single crochet to end the round.

IMG_1623.JPGA:
Row 1: Single crochet around the washer until there are 40 single crochets.  Slip stitch to join.
Row 2:  Chain 2 for the first stitch and 4 double crochet in the same stitch.  Skip 1 stitch, single crochet in next stitch, skip 1 stitch. *5 double crochet in the next stitch, skip 1 stitch, single crochet in next stitch, skip 1 stitch. Repeat from * around. Join with slip stitch.

B:
Row 1: Repeat row 1 from A.
Row 2: Chain 1 for beginning stitch, *single crochet in next 3 stitches, chain 4, skip 1 stitch. Repeat from * around. Join to the beginning of the row with a slip stitch in beginning chain.
Row 3: Chain 1, skip 1st stitch, *single crochet in next stitch, skip next stitch, 8 single crochet in chain-4 space, skip next stitch.  Repeat from * around.  Join with slip stitch.,

C:
Row 1: Repeat row 1 from A.
Row 2: Chain 2, 3 double crochet in first stitch; chain 1, skip 3 stitches then 3 double crochet in next stitch (cluster). Chain 1, skip 3 stitches and cluster 3 more times. Chain 3 and 3 double crotchets in same stitch (corner made). Repeat sequence 3 more times to create a square effect. (Refer to photo for assistance in this one). Join with slip stitch.

D:
Row 1: Repeat row 1 from A.
Row 2: Chain 2 for beginning stitch, *2 double crochet in next stitch, 1 double crochet in next stitch. Repeat from * around. Join with slip stitch.

IMG_1624.JPGE:
Row 1: Repeat row 1 from A.
Row 2: Chain 2 for the beginning stitch, *double crochet in the next stitch, chain 2, skip next stitch.  Repeat from * around.  Join with slip stitch.

F:
Row 1: Repeat row 1 from A.
Row 2: Chain 1 for beginning stitch, single crochet in the next stitch, chain 3, slip stitch in the 1st chain made to create a picot, single crochet in the next two stitches. *Single crochet in the next 2 stitches, make a picot by chaining 3 and slip stitching in the first chain made then single crochet in the next 2 stitches.  Repeat from * around. Join with slip stitch.

G:
Row 1: Repeat row 1 from A.
Row 2: Chain 3 for beginning stitch, 6 triple crochets in the same stitch, skip *stitches.  *8 triple crochets in the next stitch, skip 2 stitches. Repeat from * around. Join with slip stitch.

H:
Row 1: *Single crochet in washer, chain 2. Repeat from * around 9 times. 10 single crochets total.  Join with slip stitch.

A great dollar store find works as a holder.
IMG_1613.JPG

Uncategorized

The Big S (Finishing the Edges)

IMG_1948.JPGSo I came up with a finish for the big S’s edges. In a previous post, I was working on a giant papier-mâché letter. My fabric was not covering the edges. I rummaged around in my spare wedding decorations and found a spoil of matching ribbon. I used my Mod Podge to apply the ribbon but sound found the ribbon was too stiff to stay stuck on the square edges. I remedied this problem by creasing the ribbon before applying the glue. The ribbon still was not sticking well so I had to resort to using tiny bits of transparent tape to hold the ribbon in place until the glue dries.

TIP: Transparent tape will not stick to Mod Podge so be sure to place the tape in areas that are not oozing glue.

This should finish this table declaration. One down, twenty-gazillion to go.

Sewing · Tools

New Sewing Tool: Cross-Lock Tweezers

I have discovered a new sewing tool.  It is a set of tweezers that I found while digging through the surgical supply tools in a vendor booth at a quilt show.  But this is not any ordinary set of tweezers.  They have a “cross-lock action” meaning through some magic of physics both blades cross and actually press against each other to remain closed rather than open like standard tweezers.  I chose the sharp pointed stainless steel ones.  With the sharp points, the tweezers can be used as a stiletto to push or hold small trims as I sew over them.  Then with a squeeze of thumb and forefinger, they can grasp like standard tweezers.  I find this especially useful with guiding small, intricate items under the presser foot. I admit that I use them a lot to pull the selvages out the back of the presser foot.  You know that moment when you started sewing too close to the beginning edge and things start to ball up?

These wonders are also called self-closing revers-action forceps and seem to be available at many tool stores.


Uncategorized

The Big S

IMG_1895I succumbed to Pinterest’s siren song and purchased a large papier-mâché letter at my local craft store.  It was on sale and all of those Pinterest pins lulled me into a sense of confidence that I too could make a beautiful wall or door decoration out of some plain brown kraft paper glued onto a cardboard frame.  The fact that Dear Daughter is getting married in a month gave me a good excuse to satisfy both my crafting urge and my need for a decoration with visual impact for the wedding reception candy bar.

I selected a piece of fabric that matched the wedding theme and purchased a piece large enough to cover the large letter.  It should have its back side to the wall so there seemed no need to waste money and time on covering the back.  Mod Podge and foam brush in hand, I began adhering the fabric to the letter.  I soon found that I needed to work quickly and in small areas to keep my Mod Podge from drying too fast.

The front of the letter was quickly done and then it was time to tackle the sides of the letter.  Then it occurred to me.  All of my initials have always had straight sides.  It has always been easy to applique my letters or sew my initials because A’s, M’s, & L’s are straight in most fonts.  Dear Daughter is marrying an S.  I have never worked with curved letters before and suddenly it struck me that fabric does not fit around curves easily.  Using my best sewing skills, I whipped out a pair of scissors and proceeded to clip the curves.

IMG_1898I clipped and podged and folded around the entire edge of the letter.  Despite my best efforts, papier-mâché showed in the clipped curves.  I think that is unacceptable.  That will never do for Dear Daughter’s special event.  It is time to come up with another plan for the edges.