Alterations · Sewing

Pillowcase Learn to Sew Class

When people find out I sew, the first thing out of their mouths is one of two things.  One response is “I have some pants that need hemming. Can I get you to do that?”  The other response is “I bought a sewing machine because I wanted to learn to sew and it is still in the box.”  Sometimes that second response will vary in that they have taken the machine out of the box but have not proceeded further.  Lately, I’ve been trying to find a profitable outlet for my sewing skills and knowledge.  I’ve been pursuing several different ideas until reading the post, The Commitment Phobic Creative, by Braid Creative & Counsulting.  They advise making a list of “all the things you can or want to do in your creative business“, then “crossing out the ones that you haven’t actually been paid for in 6 months.”  (If you wish to re-live my original drama, see my earlier post.)

So, here we are, weeks later, with list made and items crossed off and some very real soul searching.  And, as bad as I hate to admit it, EUREKA! I may have found the answer.  Fingers-crossed, hold your breath, I may have found a niche that needs me. All of my paying and non-paying interactions with folks concerning sewing have been the above two responses.  So, why not focus on that?  There must be a need, right?

A couple of ladies at church used the two responses I mentioned earlier.  So I set about to come up with a means to teach them to get that machine out of the box and conquer their fear.  I stumbled across All People Quilt’s 1-Million Pillowcase Challenge. I developed a quick little learn-to-sew class around making a pillowcase.  The goals of the class were to get participants sewing on their machine with some confidence and completing a project.  I made up silly little invitations, booked the church fellowship hall and invited six ladies.  Five of them came!  I provided assistance to those that needed their machines set up and provide fabric kits from my stash so there would be no stress if mistakes were made on their own personal fabric.  Five ladies walked out of the hall two hours later with a completed pillowcase.

You would need to ask them, but I believe from their responses after class, they enjoyed themselves.  Many of them have requested more classes.  They unanimously have requested an alterations class.  So I’ve been researching it and writing a lesson plan.  Every time I talk about what I am doing, I gain one or two more interested students.  So, here we gooooooooooo.


Sewing · Tools

Product Review: Clover Protect and Grip Thimble

My hand quilting has been on a hiatus for a couple years while I have been doing the whole “get healthy, get active” thing.  When I returned to my project, I quickly found out there had been a change.  My favorite thimble no longer fit.  I had no idea a 45lb. weight-loss could affect the tips of my fingers.  So I frantically began searching for a new thimble.

REVIEW: The Clover Protect and Grip Thimble is an innovative thimble trying to satisfy two sides of the thimble-wearing community.  It features a dimpled and ridged metal tip attached to a flexible rubber body.  The flexible rubber body has an unusual scallop design that is “for air flow keeping your finger cooler”.  I picked up a hot pink one in a size medium from my local fabric shop.  My finger fit comfortably through the size guide that is provided on the packaging although I think perhaps I would find a size large more to my liking.  The thimble goes on easily, a problem I usually have with metal thimbles.  A round thimble does not fit on my oblong-shaped finger.  Once situated, the thimble was securely in place and I did not worry about it slipping off.  I tried a few stitches with it.  The metal tip seems to be off-balance and perhaps even too thick.  It was difficult to judge the tip of my finger with the added length of the metal tip. I generally push with the pad of my finger and that is not possible with this thimble.  The flexible rubber sides are too soft and will puncture so there is no pushing with anything except the very top of the tip.  I find this awkward considering I’m not quite sure where the tip of my finger is with the added length of the metal tip.  Instructions on the back of the package, in fine print, instruct users to remove the thimble by rolling the rubber sides up instead of pulling it off by the metal tip.  I imagine that it wouldn’t take many tuggings and the tip would come off the rubber body.  All in all, the Clover Protect and Grip Thimble is not a bad thimble but it will not work for me as a daily workhorse.  It would be an excellent choice for a beginner that needs to become accustomed to wearing a thimble but is not a good choice for experienced quilters that are accustomed to a metal thimble. I will probably keep it as a backup thimble to use on small projects.  It is not a bad value at $8.99, although I would like to try a larger one to see if the metal tip would be more balanced for me.

NOTE:  This is an unsolicited product review.  All opinions express are those of the authors.

I will revert back to a very old metal thimble that I have taken a hammer to until I can attend the American Quilter’s Society Quilt Week in Paducah, Kentucky at the end of April  and search for a better thimble.


Sewing · Tools

Thimble Problems

ImageI’ve been on the a health and fitness kick for the past 2 years.  You know, the whole “Get fit, get healthy” thing?  I have been doing Weight Watchers and while, yes, it works, and yes, I did lose weight, I have had to give up so many activities that make my soul sing.  In getting fit and adding exercise to my daily routine, I have trashed my knees and feet while being separated from quilting, sewing, and knitting, and all for what?  That is for another post and another day.
Now that the knees are injured I have returned to quilting and sewing.  Recently, I slipped on my old trusty thimble to find that I could not keep it on.  My fingers had lost weight!  I know I should be rejoicing but I spent years trying to find the perfect thimble.  I have agonized over all types of thimbles and have tried almost every one on the market until I found a wonderful thimble called the PQF thimble. (It is not the thimble shown in the photo.)  The PQF thimble was perfect for me.  It was made out of an indestructible black rubber and was guaranteed to last a lifetime.  I have the hand strength of a lowland gorilla and can snap or bend a size 10 quilting between needle in one stitch.  The PQF’s rubber body would conform to my not-round shaped finger where metal thimbles had never been able to fit securely.  I was able to push the needle with any part of the PQF thimble through multiple layers of fabric and batting with no fear of puncturing the rubber or my finger.  And now, this miracle of modern engineering does not fit!

So, being a modern woman, I turned to the internet to see what the current technology is providing by way of thimbles.  First I searched for my favorite, the PQF.  Every link to those thimbles leads to a Japanese website or a woman’s fashion store.  I had to take a few hours to mourn the passing of my thimble.  A lot of good the lifetime warranty has done me.  So now I find myself in desperate need of a thimble that fits and works for me and the industry has little to offer.

Stay tuned for more thimble agony as I search for that thing that has gone the way of the DoDo …….the “perfect thimble”.

Pouches

Sew-it…Today Magazine Pretty Little Pouch

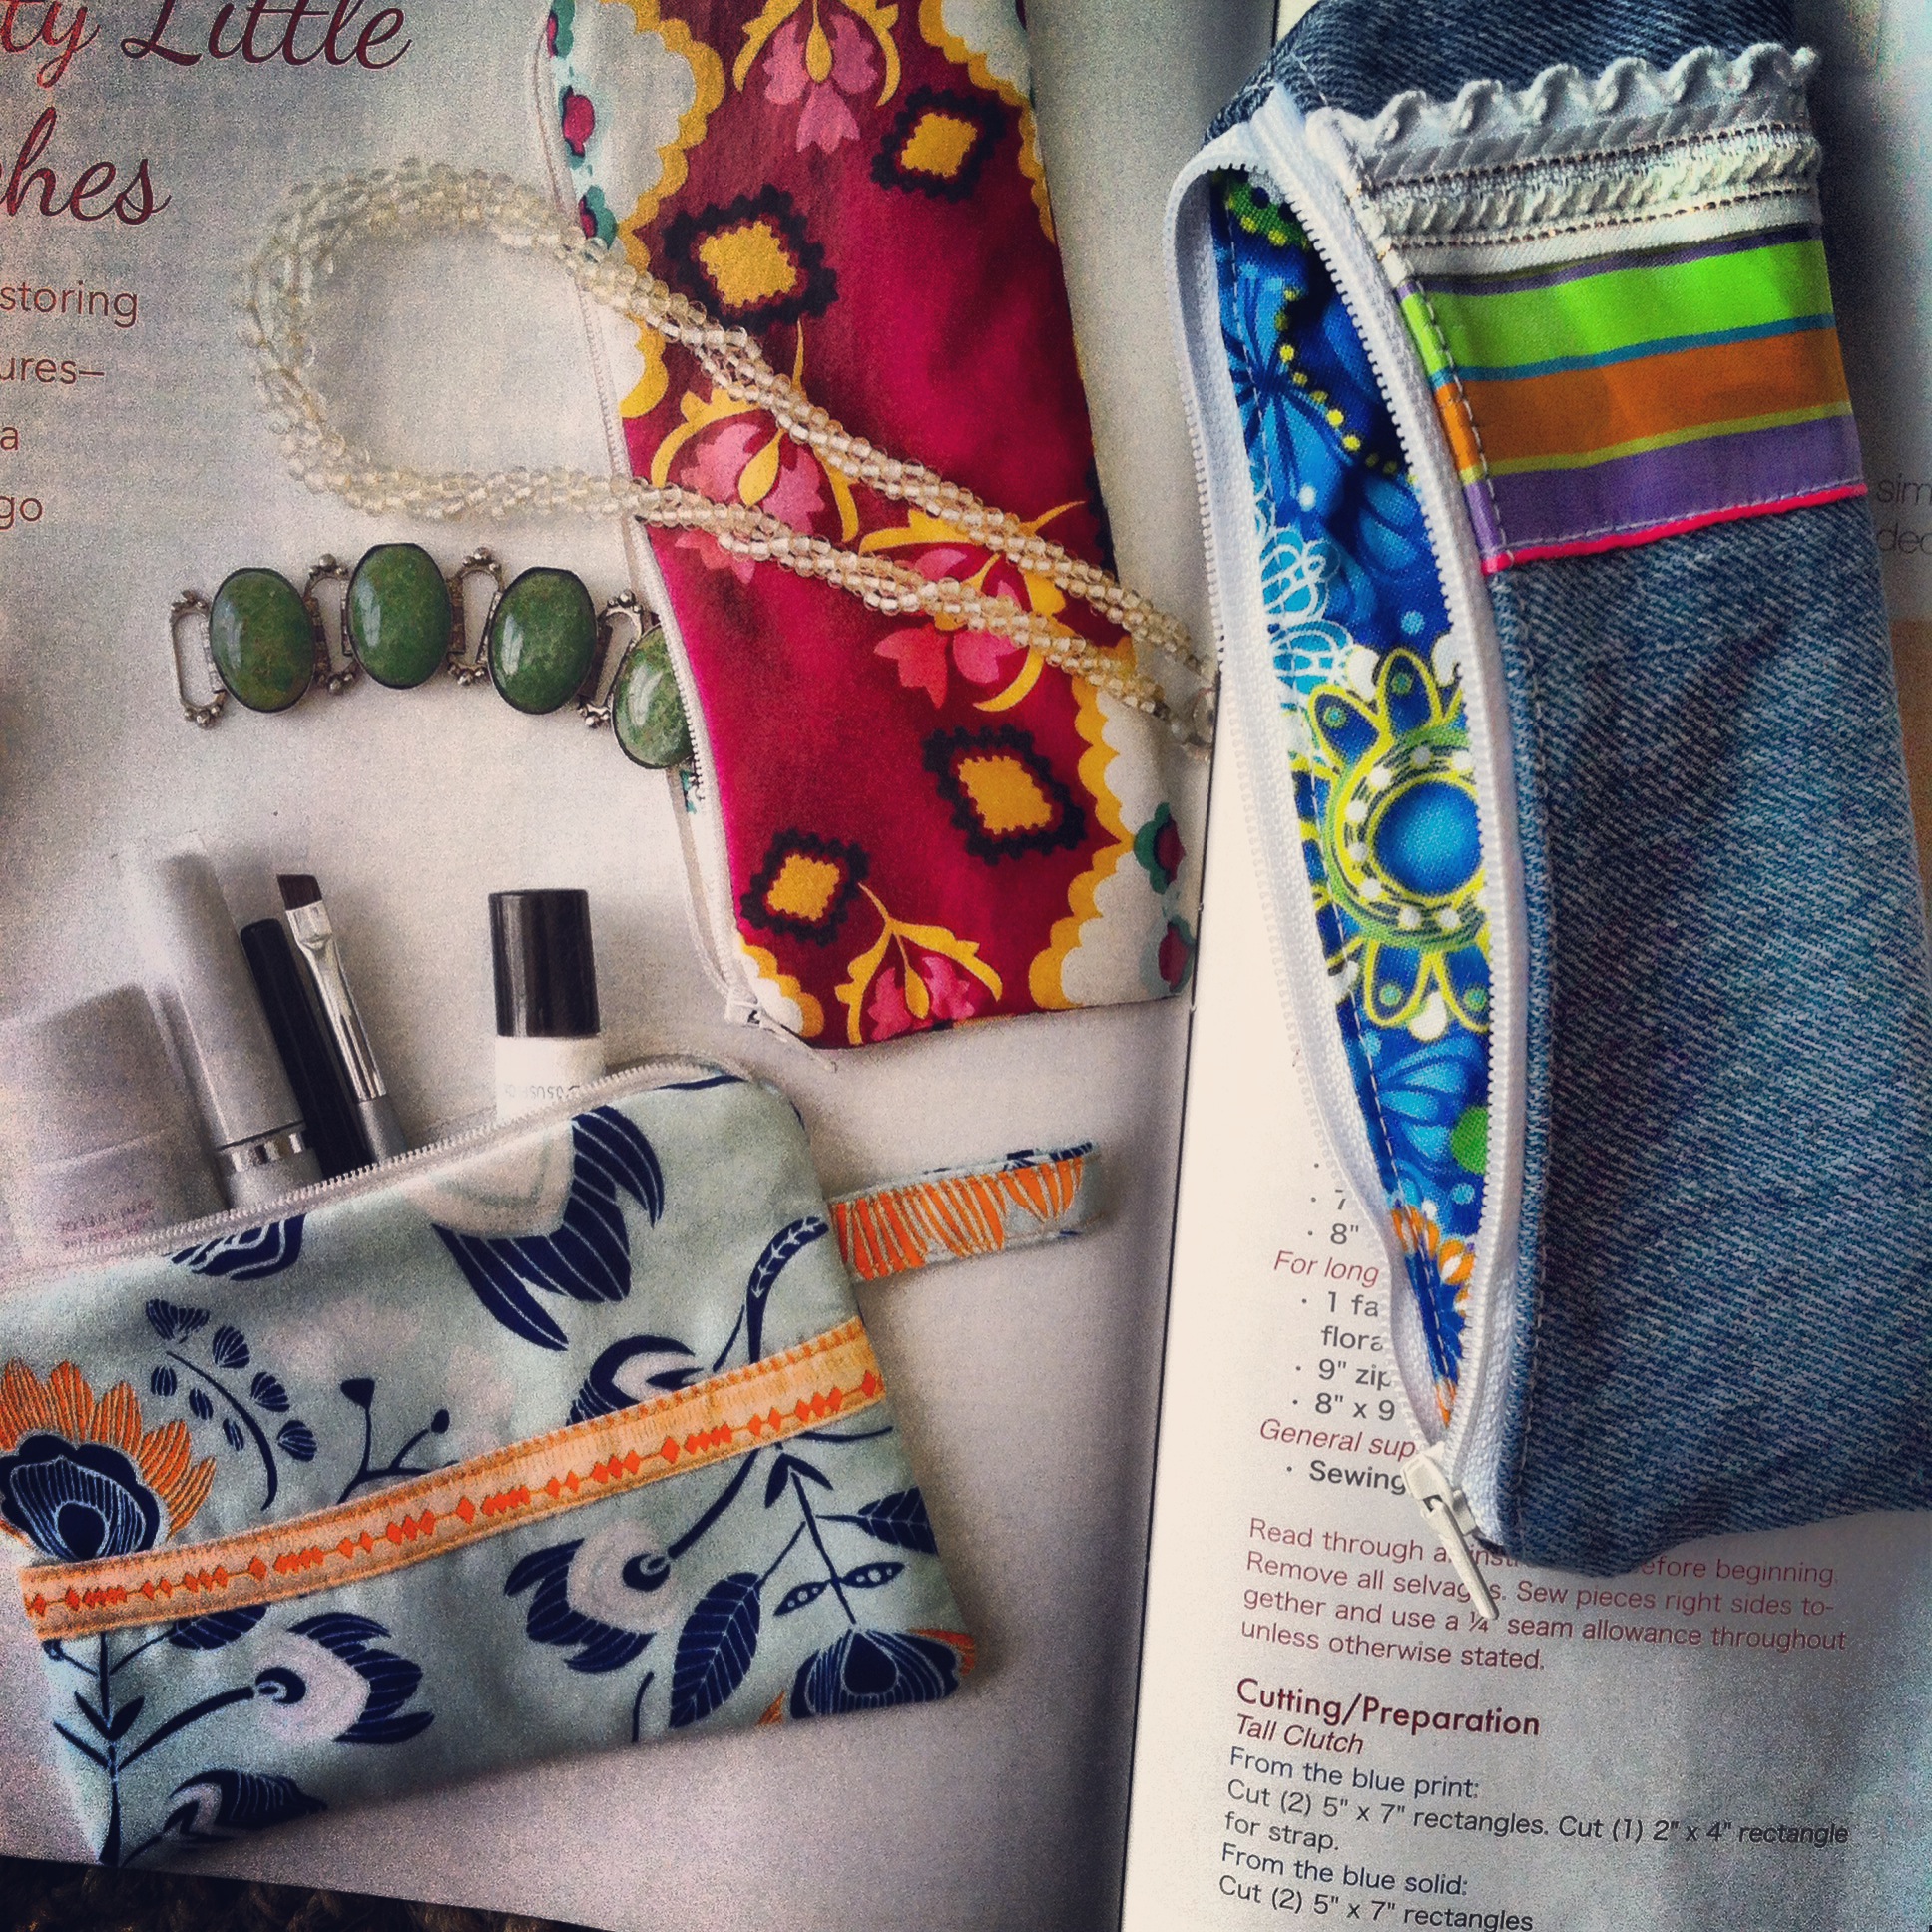
2014-03-05 15.05.11-1I am always on the look out for the “perfect little bag” to carry various objects of necessity in my purse.  Generally, I find that they are all the wrong shape.  I don’t want a large 4in. by 4in. square bag.  I want something long, narrow and easy to toss in a small purse.  (I am not known for having the patience to pack a suitcase when going anywhere.)  I picked up the latest issue of Sew-it… Today magazine on a local newsstand.  Being a tech person, I have made the jump to “the cloud”, ebooks and mobile devices so for me to purchase an actual paper publication meant that there had to be something intriguing in it. 

Flipping through the pages, I ran across this Pretty Little Pouch. I could not resist it.  But I cannot follow instructions completely letter for letter.  I must add my own unique spin to everything I make.  That is the whole point of sewing, right? The cotton fabric and interfacing used in the article was nice but my thought was “what about some recycled blue jean denim?”  Everything in my purse takes a beating and needs to be as sturdy as possible. So here is my version:  recycled denim outer fabric which is sturdy enough I didn’t have to add the interfacing along with a kicky lining fabric that makes me happy and some vintage trims from the Grandmother’s stash.

And I love the shape!


Sewing · Uncategorized

Blue Jean Baby Bibs

2013-11-23 16.45.27-2I love working with denim.  The new Re-purpose, Recycle trend really has me intrigued.  I was recycling denim before it was cool.  My mother insists that each family member receive a homemade denim throw on the successful completion of a driver’s license test. This denim throw is to go in the car trunk for anything, accidental or otherwise, that might come up.  And each time a new significant other has been brought into the family, she very promptly gifts them with one.  So it is natural for me to make purses, tote bags, and other fun accessories out of denim.  I find it to be a very sturdy serviceable fabric that needs very little special treatment. If it gets dirty, throw it in the washing machine.

I pinned an adorable set of baby bibs on Pinterest that linked back to a Notes From The Patch blog tutorial.  I think that image has been pinned thousands of times.  It is very well-liked.  I printed off her .pdf pattern and set about making my own version of these bibs.  I had several baby showers coming up and several pairs of jeans stored up in the sewing stash.  I couldn’t help adding the heart nailheads on each.  But I did lay my pattern with the wrong sides together and cut out 2 bibs that fastened on the right side and 2 bibs that fastened on the left side.  Oh, well. As long as I give them away to separate people, no one will know the difference.  Ah, the joys of making mistakes look like a creative twist!

Sewing

Owl Baby Car Seat Cover


photoI forget that not everyone has a friend or family member who sews.  I take for granted that I have the skills to easily whip up anything I see on Pinterest.  I can choose the colors and the fabrics that I like for any project and then make it to fit whatever situation.  I assume that other people can either make what they want or order it off the internet.  Then I chat with people around me.  In chatting, I find out that very few people have the skill to make things.  One such conversation with an expectant mother and coworker led to an adorable baby car seat cover.

While planning this young mother-to-be’s baby shower, we were discussing her gift registries.  I enquired as to her chosen nursery color scheme and theme with the plans of sewing her something.  Then it hit me.  I follow her on Pinterest so I know she has been pinning baby things.  So I asked, ” Would you like me to make you something for the baby?”  She hesitated only a moment before telling me that she had been looking at baby car seat covers and would really like one but thought they were too pricey on Etsy.  A few minutes of internet searching led me to many tutorials and free patterns.  We agreed on colors, she emailed me a picture of the baby car seat she planned to purchase and a project was born.

I chose the tutorial, Baby Care Seat Cover Tutorial, from the blog, Make it Do.  The dimensions made sense to me and used basic fabric pieces with a minimum amount of cutting.  The instructions were clear and easy to follow until I reached the strap assembly steps.  I struggled with where to attach the hook and loop fasteners.  The instructions on placement of the hook and loop fasteners and attachment of the finished strap to the cover were a little limited.  I needed a photo illustrating the placement of the hook and loop fasteners on the strap. I needed another step or two with a couple more photos for clarity.  I’m not sure the straps pictured are as they were intended but I hope they will work.

All in all, it turned out pretty cute!

Bags · Sewing

Truck Trash Bag

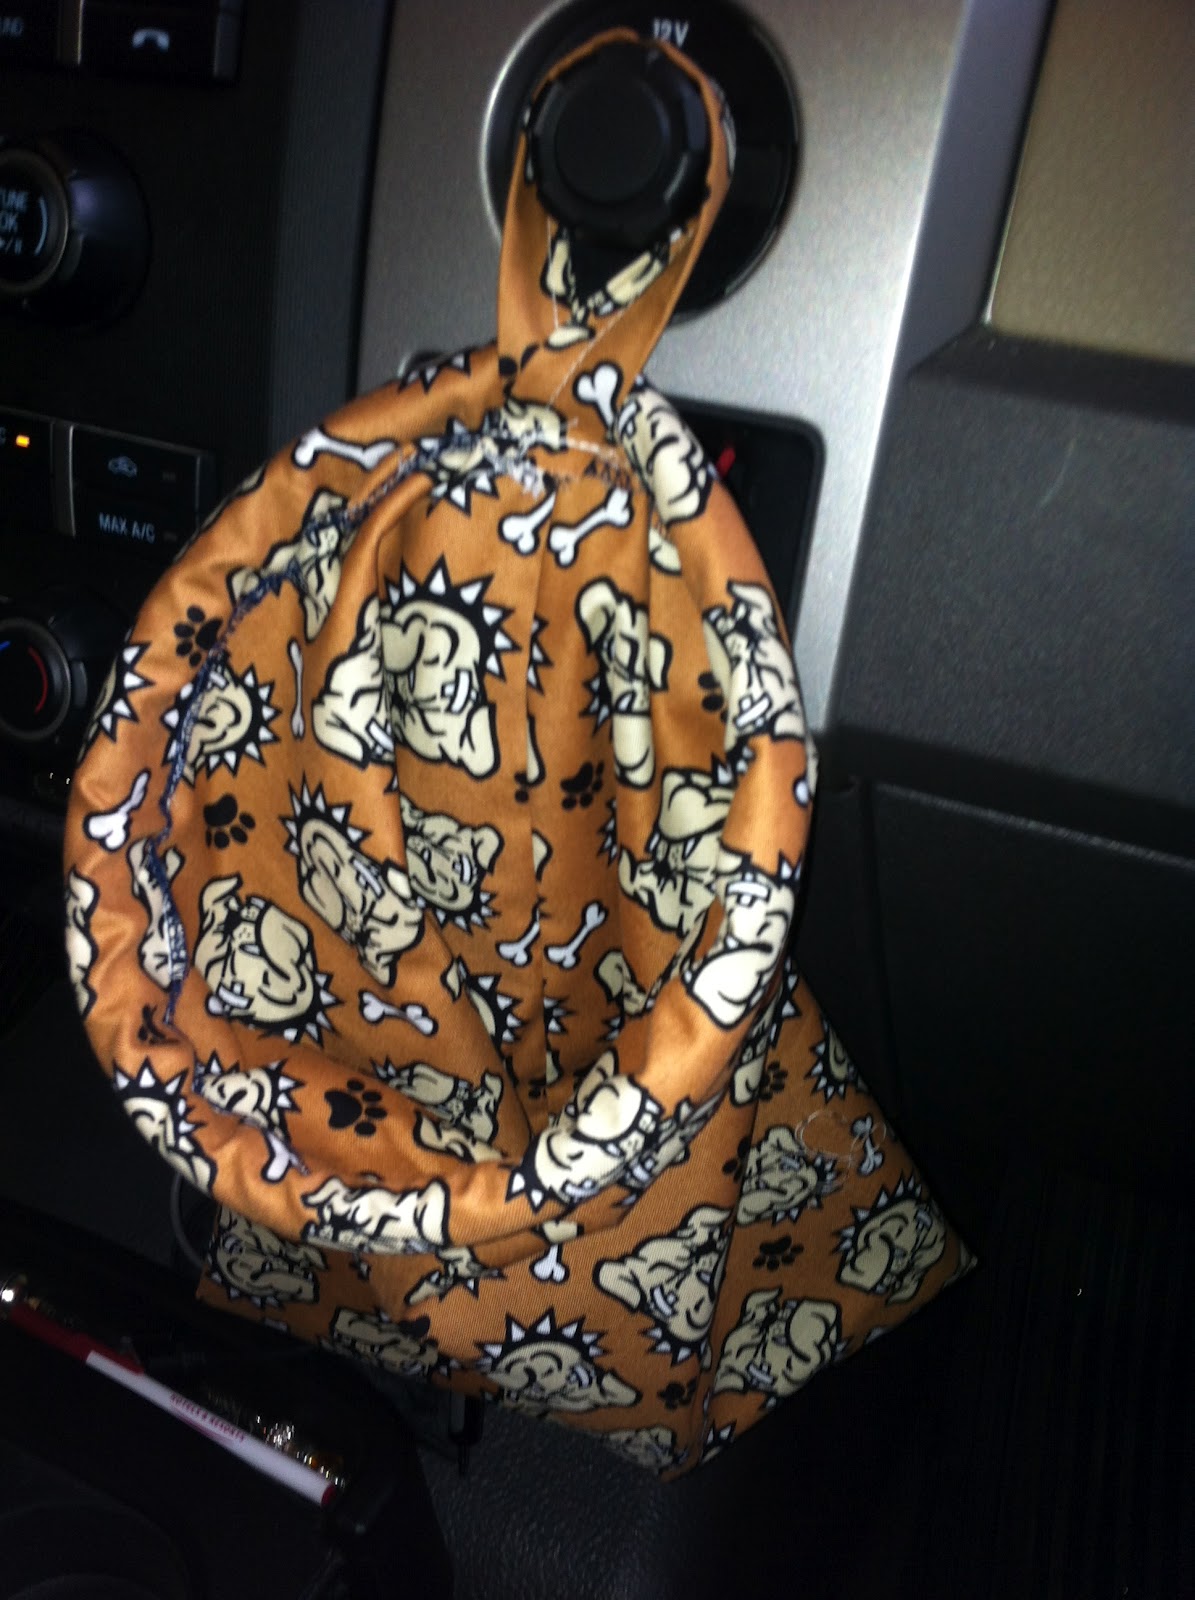
I’ve wanted to make a trash bag for my vehicle for many years and never found the time.  I’ve toyed around with many design ideas without ever really settling on one that spoke to me.  During some browsing on Pinterest, I discovered a tutorial from A Ditchin’ Time Quilts.  There is nothing that sparks my creativity more than seeing someone else’s design and realizing that is not how I would do it.  After a few days of thinking through the process, I created this little Bulldog bag.

Again, I should have taken photos through the entire design process but hindsight……you know.  This bag’s dimensions were based on the little bags that are given out at the dentist’s office…..you know the one they use for free toothbrush, free sample of toothpaste and appointment card?  Those dentist sample bags have been my trash bag for years simply because they are a heavier grade of plastic and have a neat little circle handle cut out of the bag that easily fits over door handles or cigarette lighters.

The bulldog fabric was leftover from some sleep pants that I made my husband.  Shhhh, he wasn’t too keen on my taking a photo or blogging about THOSE.  But strangely enough, the colors matched the interior of my truck.  This bag handle fits securely over my power jack cover button.  I used a short length of aquarium air hose in the casing at the top to hold the mouth of the bag open.  Although it is not present, I use a grocery store plastic bag inside this bag so that the trash can be taken out easily and will not allow liquids to leak out. A fresh plastic bag is easy to replaced since there are millions of them in every corner of our planet.

Sewing · Tablet cover · Tech covers

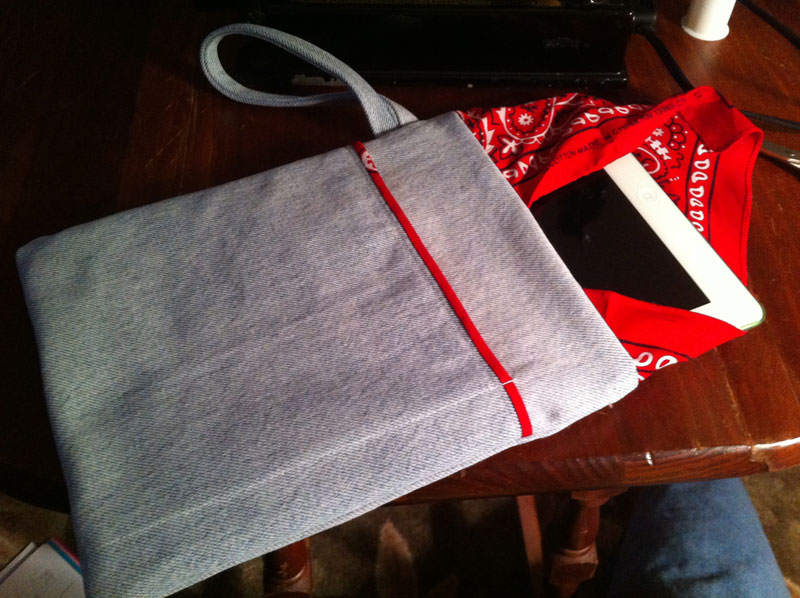
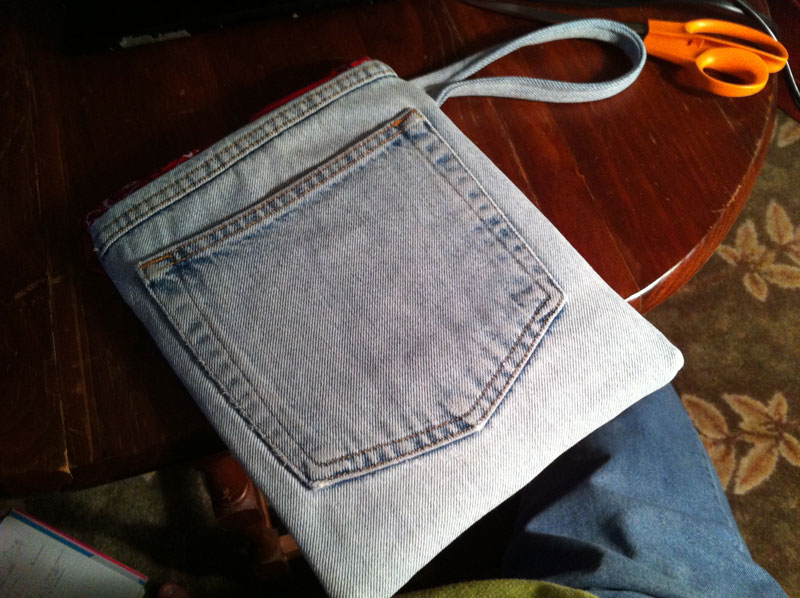
Jeans iPad cover

 This should be a tutorial.  I realize that now, but in the excitement of designing and tweaking and drafting and trimming, I really did not take the time to think of taking photos for each step.  Suffice it to say I bought myself an iPad.  I tell myself and my husband that it was so that I could be more mobile in my job and get more work done but I really think it was because I wanted to design a really cool tablet cover.  I’ve seen so many different designs. I have so many different ideas.  I can see the search for the perfect tablet cover could be almost as consuming as the search for the perfect purse.

So here is to trying to write tutorials and designing patterns.  I have the skills, I have the resources, I have the knowledge.  I lack the ability to find the time.  From now on, I need to make the time.

Notice the blog is stark white.  I removed the “trimmings” a few days ago.  I’m rethinking my brand.  I need to come up with something original and unique.  It is coming.  I feel it.  I have some doodles down on paper, like that really helps me in the digital world, but I still draw better with a pencil and paper. The universe is full of such a vast array of colors and we don’t do anything any justice if we use black and white.

So, good (colorful) things to come!

Bags · Purses · Sewing

My Bag Is So Bright, Ya Gotta Wear Shades

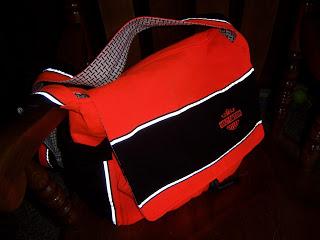
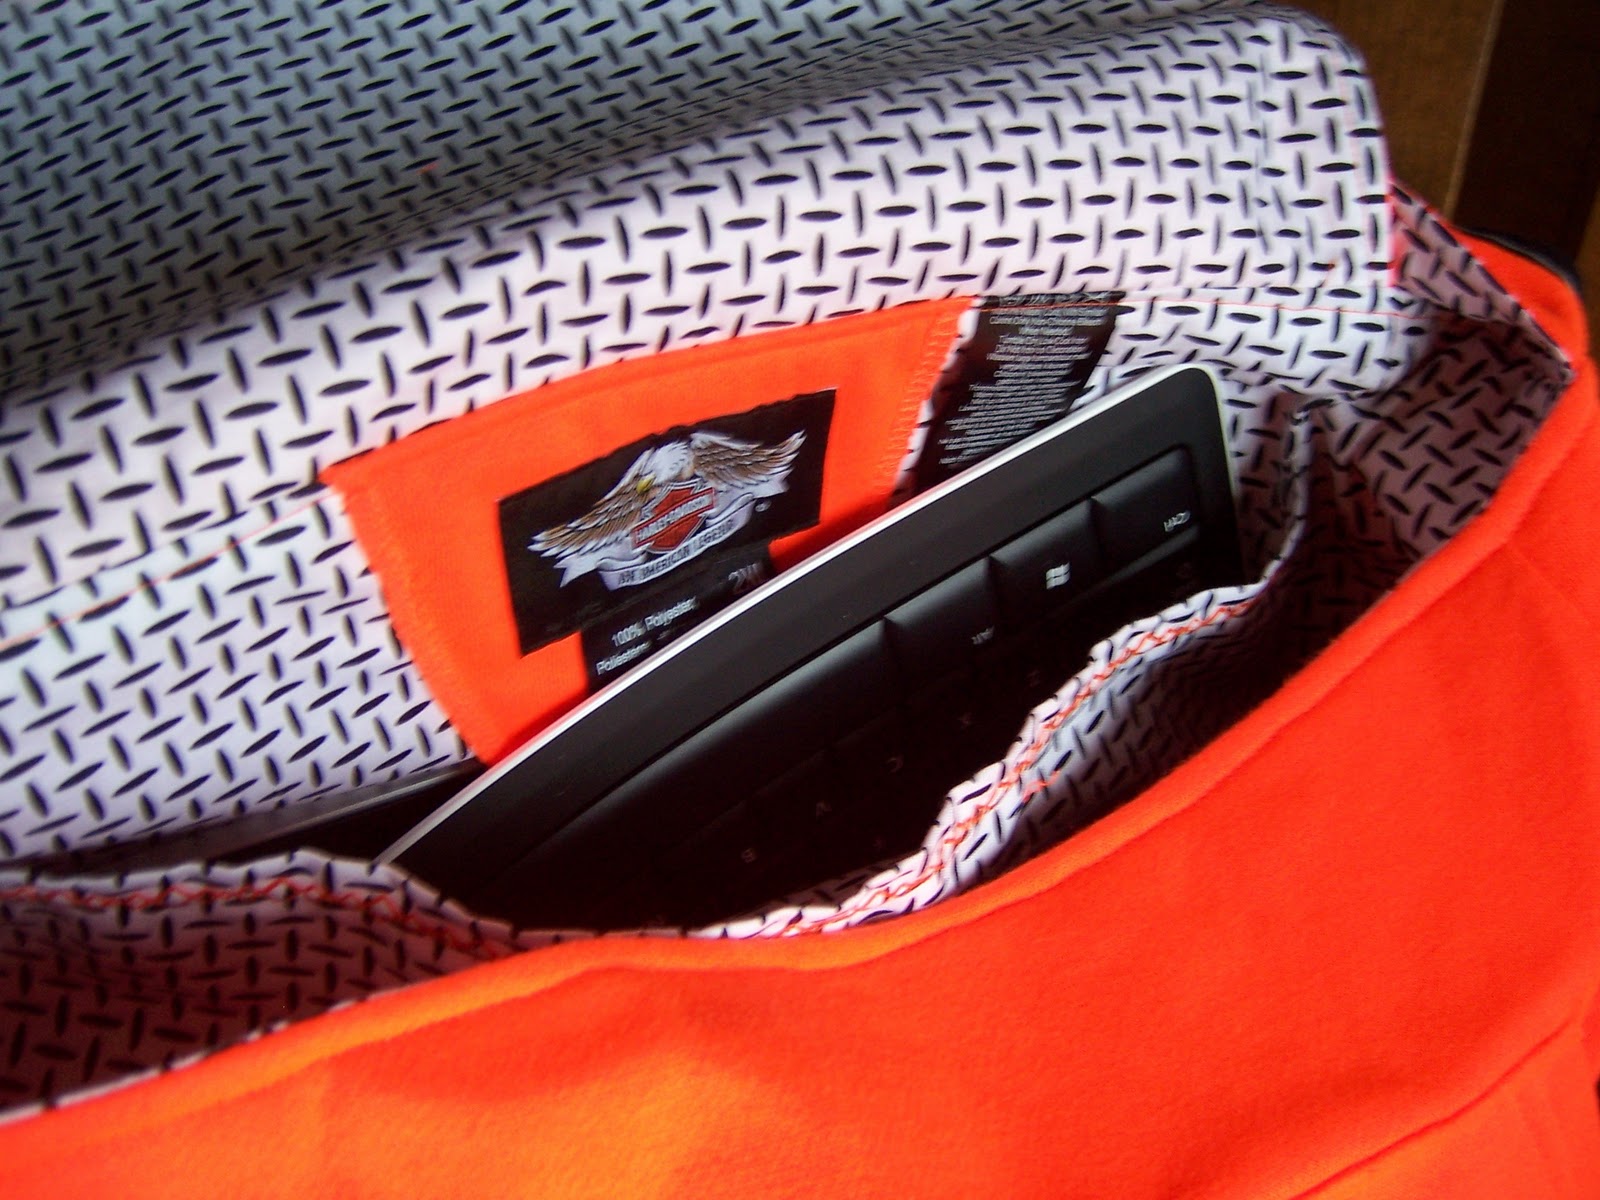
As promised, this is the confidence-builder project number 2: my orange Harley bag.  I have been trying to find a tackle twill hoodie to make a bag for myself.  I’ve calculated, sketched, planned and searched trying to find an appropriate hoodie and a final prototype. I’m finicky about my bags so this has not been an easy chore.  But, once I saw this bright, hazard orange and black Harley hoodie at a local Harley Davidson dealer, I knew it was the prefect one for me.  This photo does not truly capture the color of this bag.  It is bright hazard orange, the type of orange that you see on state road construction worker, the same color as traffic cones.  But I like orange so that is fine.  The photo is purposefully dark so that the reflective stripes show.  The hoodie was trimmed in Scotchlite reflective material and I’ve tried to retain as much of that as possible.  Notice the stripes on the sleeves were trim for the pockets which are the sleeve cuffs.  The lining fabric was another fabulous find.  I’m sure it was originally meant to be a open-weave fabric design but at first glance, it looked like diamond plate to me and that was more than perfect for this bag.

What cannot be seen from this angle is a large embroidered Harley Davidson on the back of the back.  It came from the back of the hoodie, not a problem I’ve had with the previous hoodies.  So, I simply moved the kangaroo pocket to the front which is where I wanted the pocket.  This bag is so roomy, it holds my Slate in the laptop pocket inside and even has enough room for the accompanying bluetooth keyboard. One of the cuff pockets on the end is large enough to hold my two-part power cord while the other will hold my phone.

And another design touch is to keep the labels and the care tags and re-attach them inside on the lining.

Ahhh, I’m finally happy!  I have a bag for me and my toys.  But, now, there are more hoodies to convert into diaper bags and messenger bags and that is just the beginning.  I have my design pencil out making notes on other pocket options.

Long live hoodies!

Purses · Sewing

Meaningful Distraction

So, what to do?  My current quilt project is literally kicking my butt.  It is for a client and I’m having the worst time with it.  It went together flawlessly and now, way too many months later, my mother’s health has deteriorated and my projects are piling up.  My sewing machine is soooo NOT even trying to be agreeable.  Quilting it has turned into a nightmare.  I have the feeling I have lost my sewing touch.  All my years of expertise and skill could not be found in my sewing studio.  My heart was breaking over my new machine and my inability to use it.  I finally had a fit.  I mean a throw-down, knock-out fit and decided to seize the situation in my grubby little hands and wrestle it to the ground.   I’ve been around enough years to know that when I’m struggling with a project, I need to lay it down and come back to it.  So, that being decided, I grabbed up a couple of quickies that would inspire confidence in myself once again.

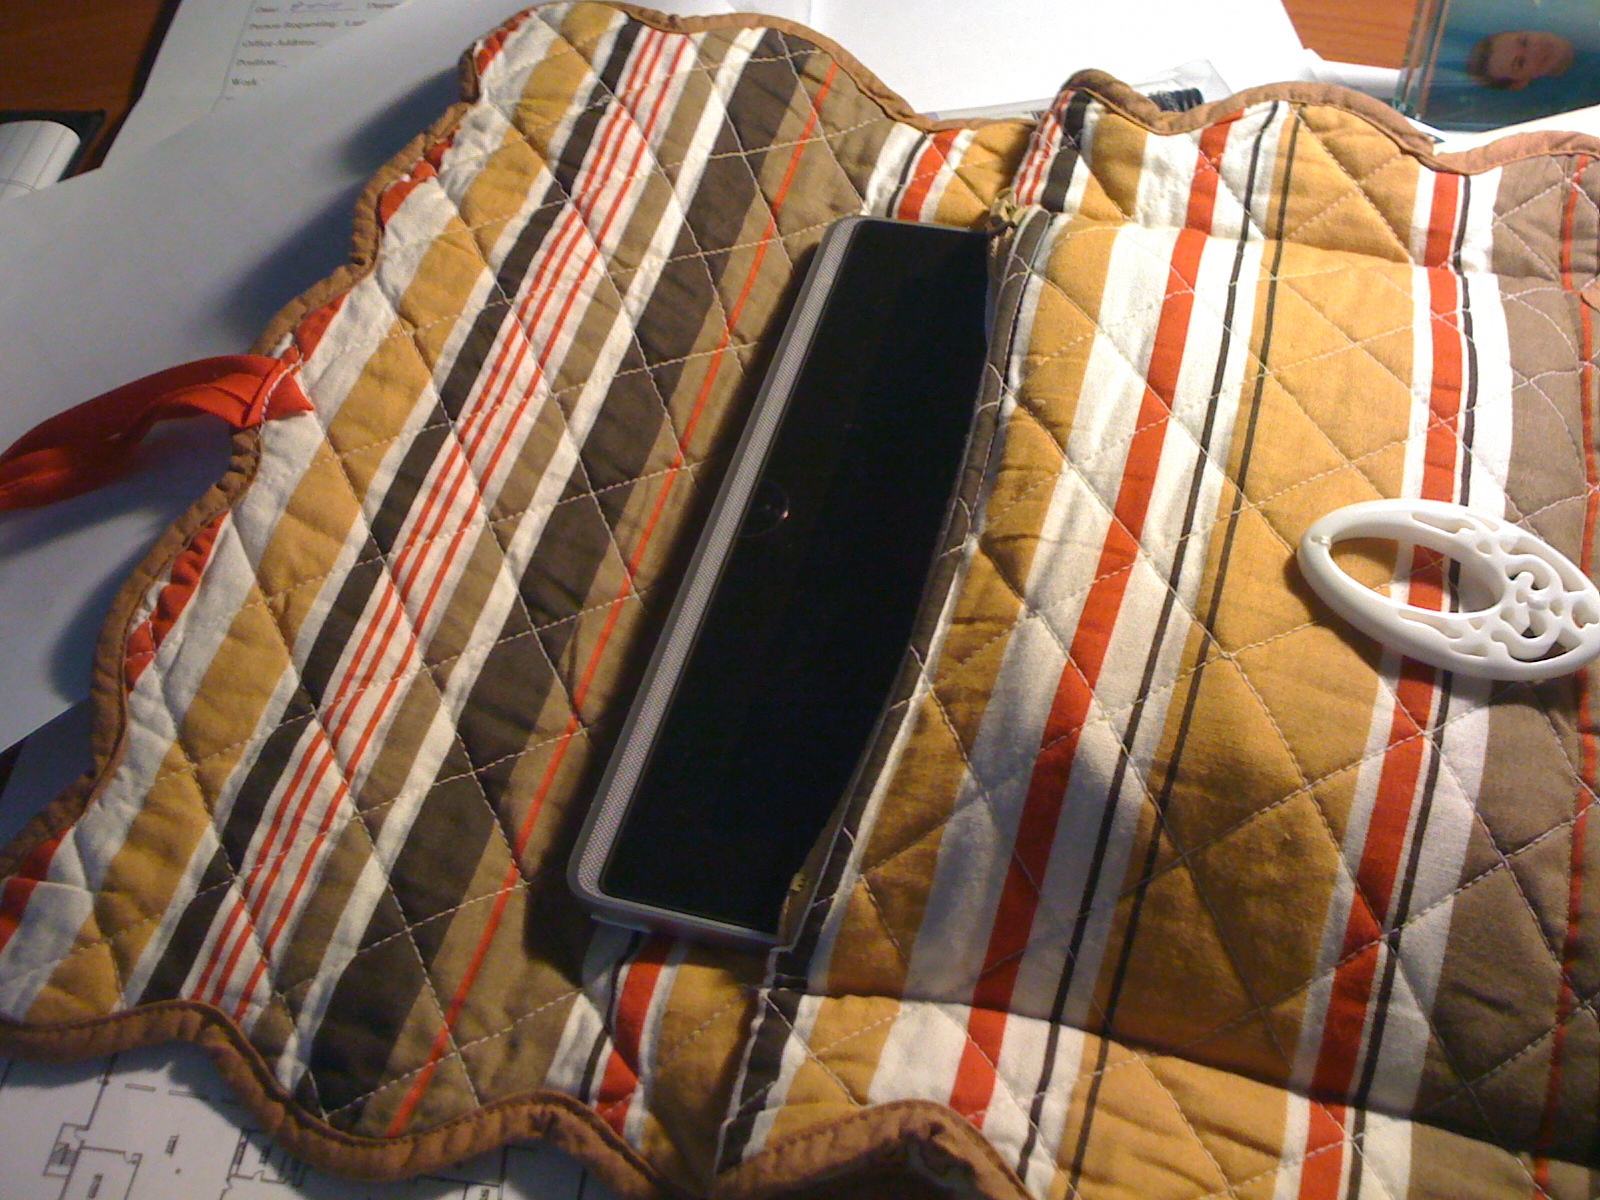
Thus, you see above, one of the fruits of the wrestling match.  I have an ASUS Eee Slate at work.  My Slate is a lovely little device that I have grown fonder of as the days wear on.  The problem is a cover for it.  The accompanying sleeve is nothing but institutional, generic black and vinyl.  And because of its new cutting-edge design, there are no commercial covers, not that I’d buy one.  I’m not the type to be average.  The Slate is a PC alternative to an iPad but it is different in that it is not the same size so even those covers or carriers won’t work.  So, the creative juices have been flowing and an idea blossomed.

I purchased these two place mats at a local Pier One store.  I hadn’t been in one in years and suddenly, these place mats caught my eye.  Yes, the ones you put on your table under your dinner plate kind.  Once, very expensive, they were now on clearance for 77¢.  They had a lovely paisley on one side with coordinating stripes on the other.  The large white button is actually a piece of jewelry found in the clearance bin at Hobby Lobby.  The colors are lovely and unique.

One design problem:  I can make a cover for my Slate but it loses battery power rather quickly so I can’t take it very far without needing the power cord so I needed a pocket for the large power converter and the associated cords. And this is what I came up with.  It is hard to see in this photo, but a zipper was inserted in the fold on the top place mat and then the place mat was folded and stitched down to create a pocket that barely holds all my accessories.
I really need to spend some time writing this project up.  I’ve not seen any other sleeve patterns with a similar pocket.  And I don’t know how people take their gadgets with out pockets.

Yay!  I carried it in to work today and it looks like part of my mojo is back.  This is the first of my 2 confidence-building projects from the weekend.  Stay tuned for number 2.  It will blind you!