Sewing

When Two Worlds Collide

My day job is in an academic library. I’m a library systems person……a tech geek. I’ve spent 35 years in this environment. I have the unique ability to take technology and translate it into common words of one or two syllables. I am the “technology translator” in my organization. Please don’t refer to me as a “librarian” as that definition requires an MLS or MLIS, neither of which I have. I am a staff person…..a professional staff, a para-professional, potato…..pa-ta-ta!

My heart is in crafting, sewing and quilting. I’ve spent my entire life doing them. Sewing is my favorite. It really doesn’t matter what I am sewing as long as I am creating with fabric and thread. This love of mine never really meshed with my day job. Sewing blogs on the web and using .pdf files for patterns are the closest thing I can get to one of my worlds touching the other. I possess all of the skills to write and draft patterns yet can’t decide which items to design first. (That is for another blog post.) It has been a problem for me. I love technology. I love playing with it, tinkering in it, creating with it and bending it to my will. But there has never been anything about sewing that could use my professional tech skills other than blogs and social media.

Until now……

I’ve developed a way to use modern technology to organize my fabric and pattern stash AND carry them in The Cloud with me everywhere I go. While working on a project at work, it occurred to me that I could use the same skills for fabric as I do for books. The academic world and more specifically the library world are becoming firmly rooted in The Cloud.  Meanwhile, the sewing world continues to be dominated by piece of paper and little clips of fabric.

So would you be interested in learning how? Would you like an e-book, video demo, online course, or more? Leave me a comment, please! I can’t believe there are not others out there struggling with this entire problem.

Alterations

Removing Pearl Snaps to Upcycle a Man’s Western Shirt

IIMG_0977 am a sucker for western shirts. The farm-raised country girl in me loves the sight of a top-stitched yoke on both the front and back of a shirt…….(because everybody knows that shirts with yokes on only the front or back are wanna be’s…..city slickers.)

The glint of pearl snaps makes me go weak in the knees. One browse through my favorite Etsy store, CowgirlSnaps, can inspire me to design western shirts for hours. I am experienced at creating and sewing western shirts. If my ample female chest would adapt more readily to the typically male cut of a cowboy shirt, I would have a closet full of yoked, pearl-snapped beauties.

When a client came to me asking if I could replace the snaps on a shirt with buttons, I was able to hide my reaction and agreed to attempt the project. She explained the shirt had been her grandfather’s. Her grandfather had recently passed away and she had claimed his shirt to wear herself. She felt the snaps made it look too masculine for her.

I am sure anyone watching me while we spoke would have seen me flex my thumbs as I remembered all the times I have mashed my thumbs while applying snaps to my home sewn shirts. I have extensive experience in applying snaps. “Surely”, I mused, “the snaps will come off the same way they went on.” I felt my thumbs twitch, anticipating the pain sure to accompany the project.

I agreed to try the client’s request. Here is what I learned:

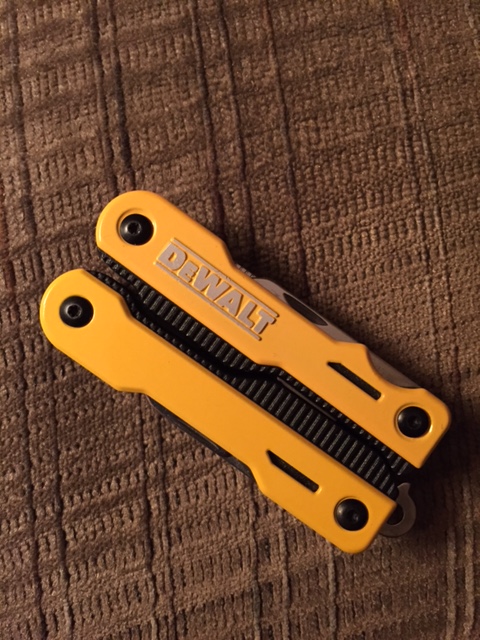
 Proper tools are essential – All snap kits come with a snap setting tool. This tool is NO help IMG_1005in snap removal. Apply a snap in the wrong spot and one is pretty much screwed. Lacking any better idea, I choose my favorite all-purpose multi-tool, a treasured gift from my husband. I find that when you put items found in hardware stores on your Wish List, husbands are more likely to give you a gift at gift-giving occasions.

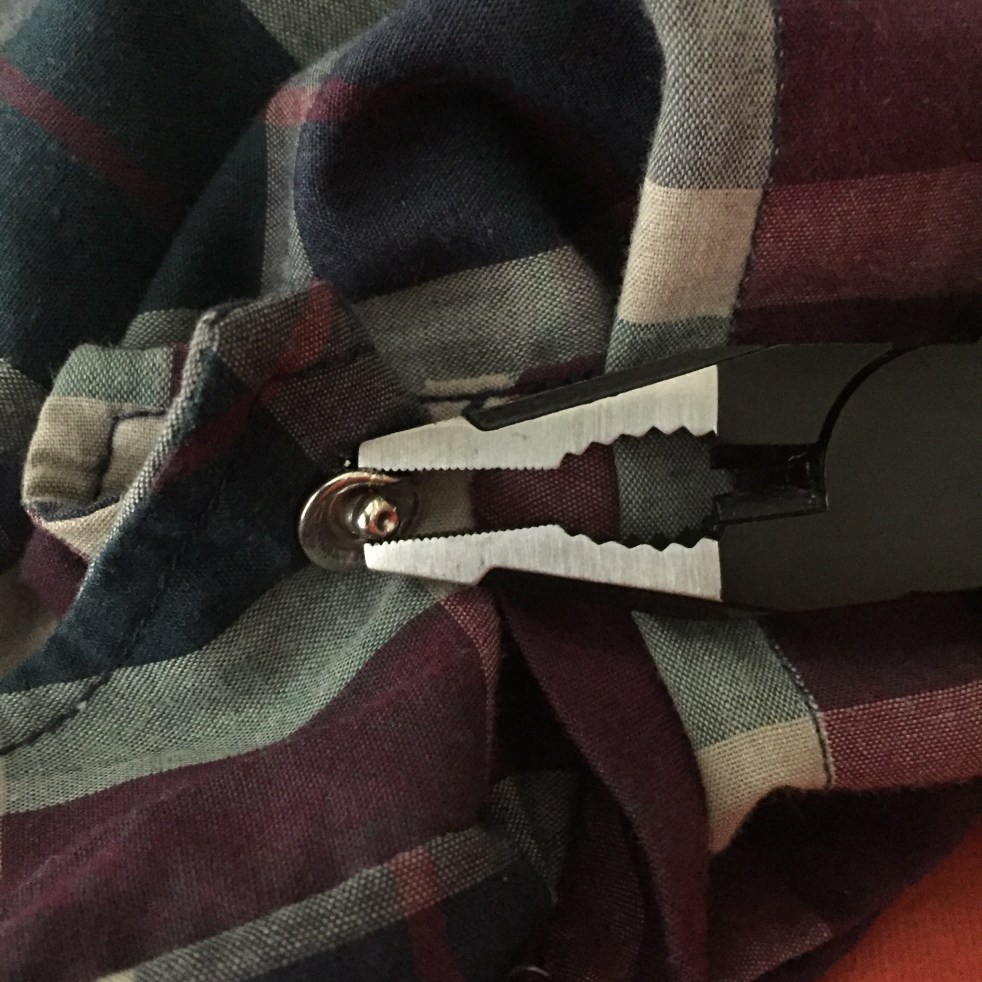
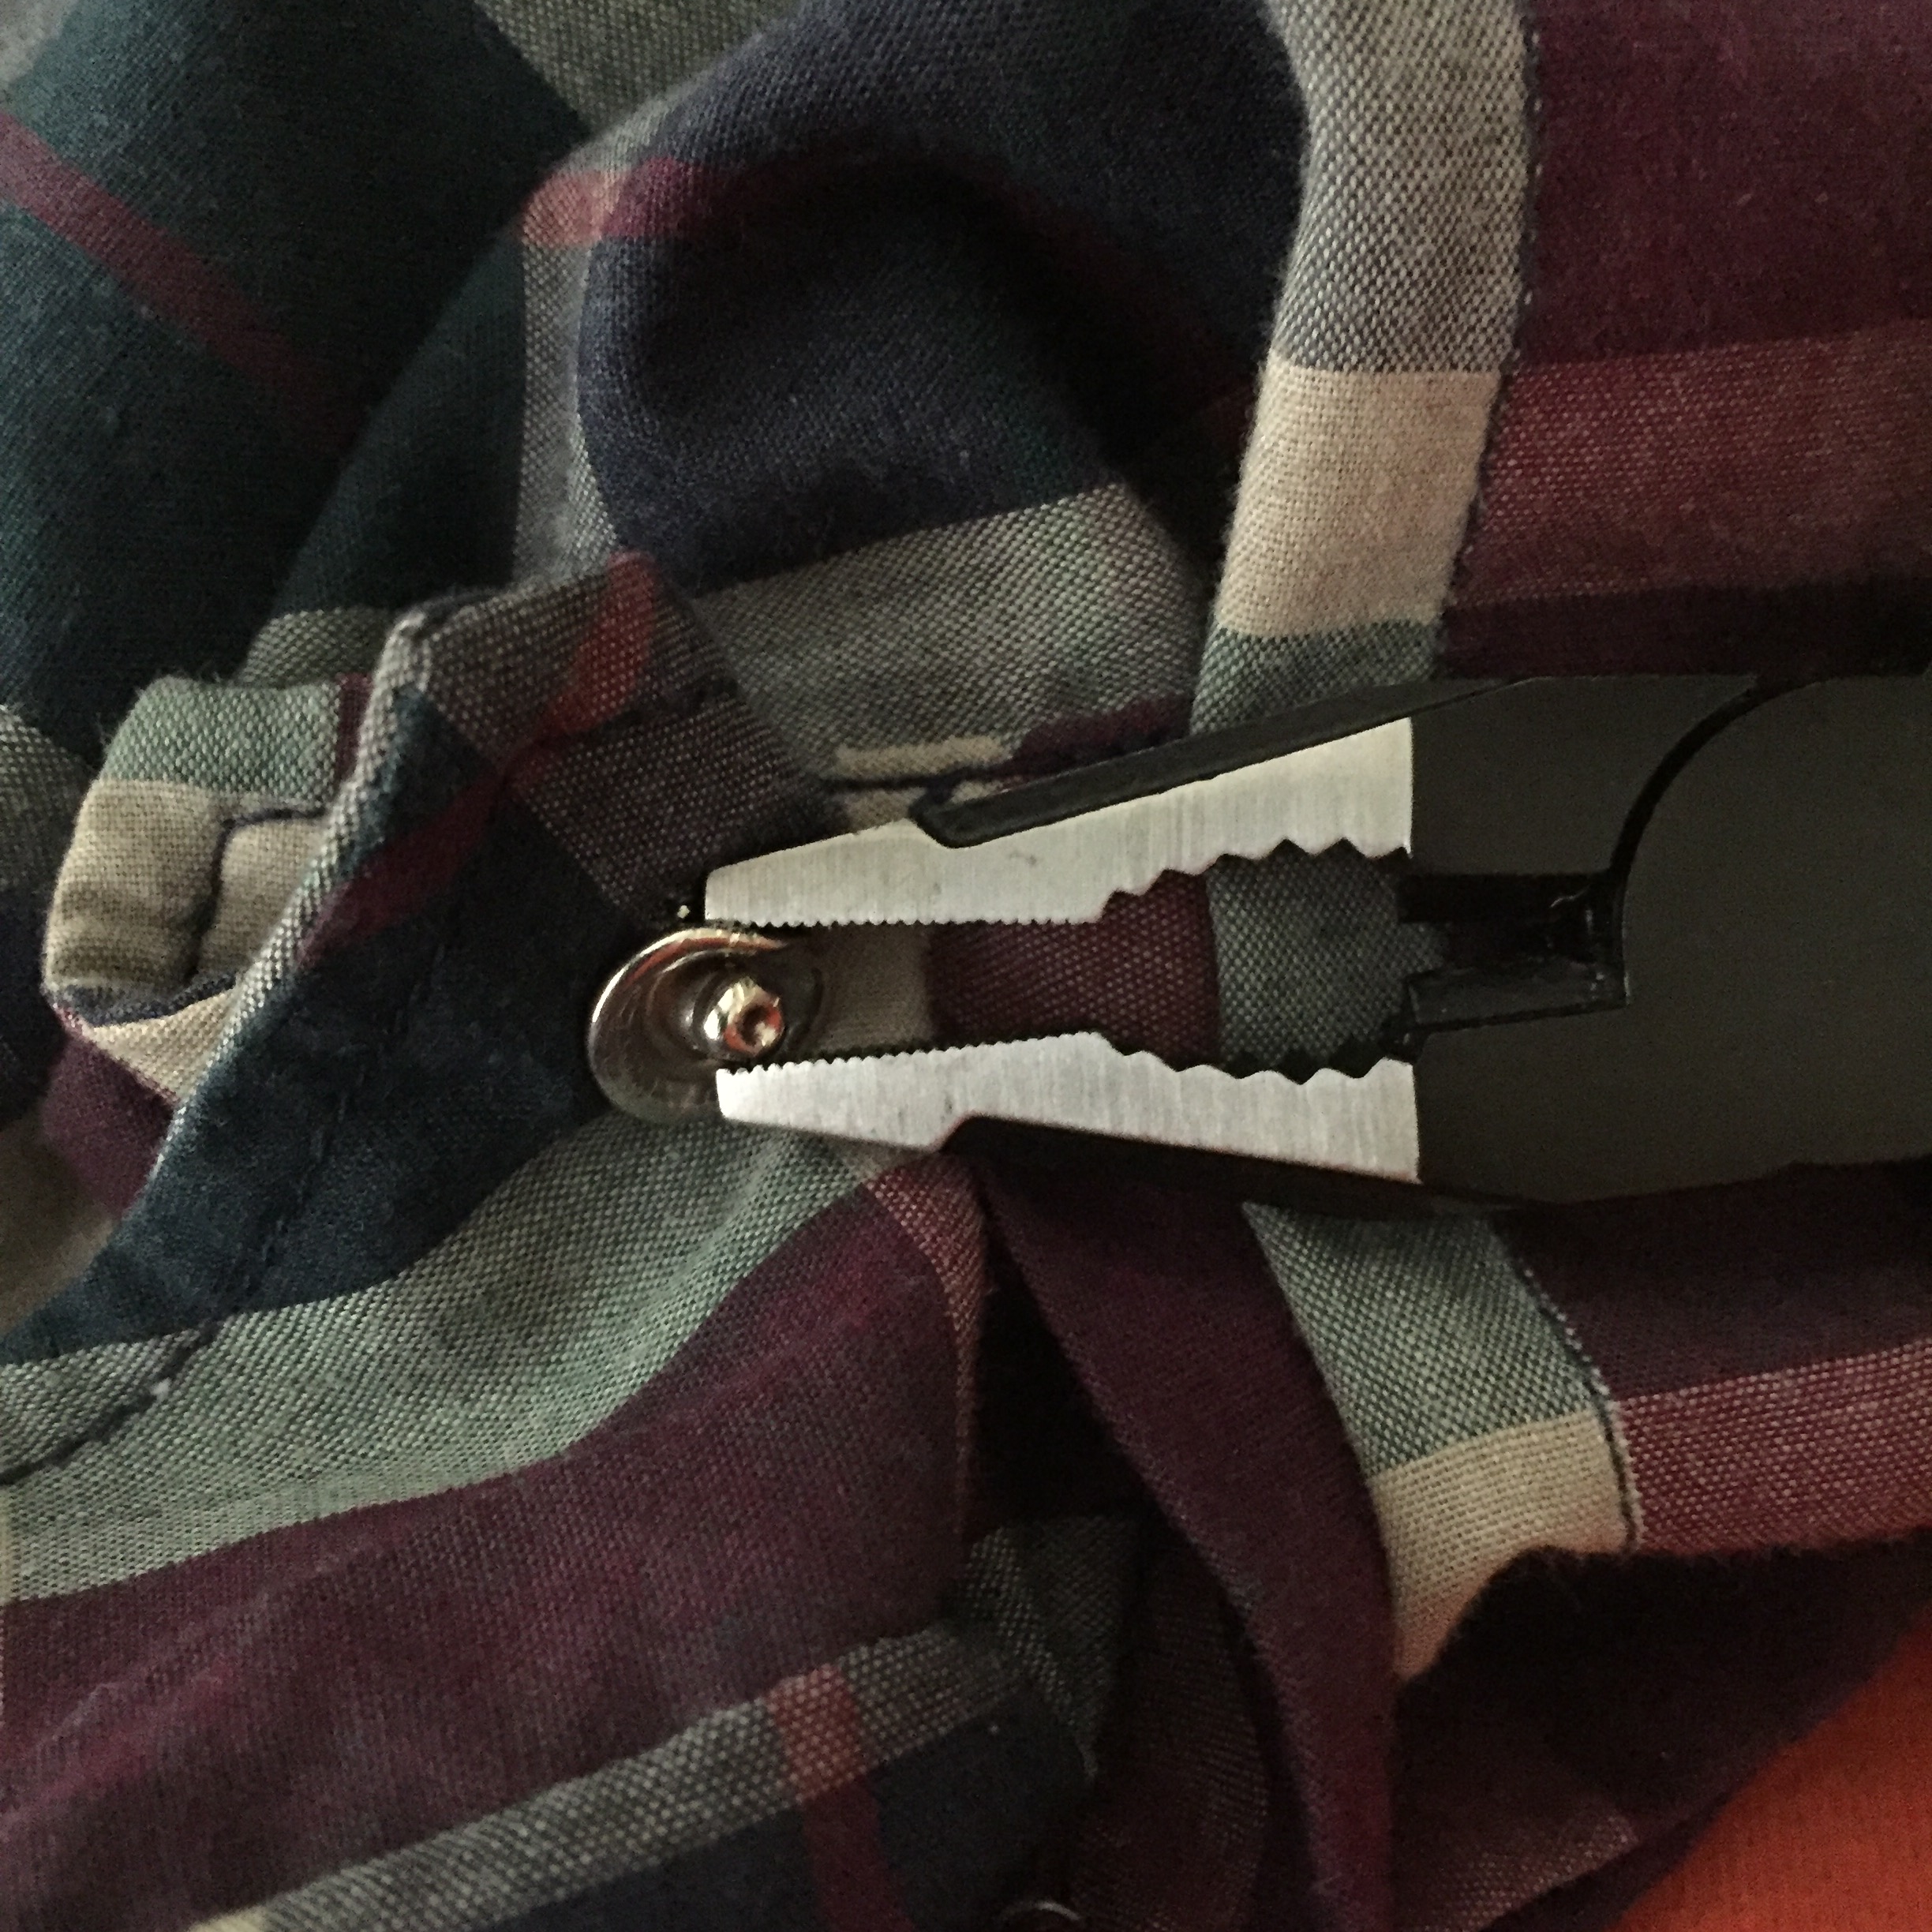
The stud portion of the snap was backed with an open prong ring. I grabbed a portion of the ring with the pliers on the tool and gently but firmly peeled the ring from the fabric. Once the entire prong ring has been pulled free, the stud should fall away from the fabric.

IMG_0978The socket portion is more difficult to remove. I used the pliers to grip the snap’s socket and tried to bend the pearl snap and fabric away from the socket. With a little bit of patience and a lot of hand strength the two parts of the snap can be separated. Once separated, the pearl snap prongs will still be embedded in the fabric. The pliers easily straightened the five prongs allowing them to slip back through the fabric in the same manner that they went in. Caution here, as some of the prongs will break off, leaving small bits of metal in the fabric, falling into the folds of clothing and carpets.

The amount of wear on the shirt and the number of launderings will determine if the presence of the snap will be noticeable after it is removed. – Good quality fabric will not fade very much and most of the time, there should be no holes under the snaps. A slightly shiny look may remain on the fabric beneath the snap but that can be covered with buttonhole or button placement.

I proceeded from here with sewing standard buttonholes in place of the removed pearl studs. (Remember which side of the shirt front or sleeve cuff that laps over. Buttons can be stitched on the shirt in the exact location of the pearl sockets, aligned with the buttonholes.

So feel free to raid male family members’ closets and cruise yard sales and consignment shops. Men’s western shirts can be feminized, snaps can be removed and replace with buttons……or hey, maybe even replace with different snaps…something with some bling, yeah, now there ‘s an idea!

Sewing

I Sew Because…

I am a sewist, a creator of clothes, quilts, bags, home decorating, and many other things. have sewn for over 20 years. My projects have changed over the years as my needs have changed.  I was sewing before sewing was cool.  I learned to sew during the last time period when sewing was cool.

At the age of 50, I began to do some self-examination.  I realize that IO do not need to do things simply because I have always done them.  I have the freedom of choice to continue or stop processes or habits in my life.  My time is valuable and I am making the conscious choice to d those things that are rewarding to me.  This decision has caused me to inventory my activities during my spare time as well as my professional life.  Sewing dominates most of my spare time. Why?  Why do I sew? The first step is to examine why I sew in order to make a more informed decision on whether to continue devoting so much time to it.

I wish I could say sewing is my artform.  Sewing is a means of creative expression for many people.  They consider themselves fiber artists. I can say I may create art and each project has my aesthetic throughout it, but I am no artist.

I wish I could say my sewing is the result of my inner urge to be a “maker”.  There is currently a huge Maker Movement underway.  I wish I could say I sew from a deep inner need to make things and create objects. Yes, I have a desire to create things and learn techniques, both traditional and modern. I love learning new crafts.  I will forever be a student of how things are made, but I am no maker.

I can definitively say, after much introspective, that I am a sewist out of necessity.  I would like to turn this blog into an art gallery or maker space, but it is a complete waste of time.  I have asked myself the hard question.  I have no doubt now that I sew because the goods I need are not readily available.

I learned to sew clothing because my mother sewed clothing.  My mother learned to sew clothing because her mother sewed clothing.  We made my clothing because garments were not available in my size.

There were no clothes to fit me in the late seventies and early eighties.  I suffered from being a healthy child from hearty Midwestern stock.  No one in my family fit within the standard size measurements established in the late forties.  I remember a school year when I was finally able to fit into husky jeans designed for girls much, much older than me.  For a few golden months, I was able to wear jeans from a mail-order department store.  I remember that being a year that I thought I was someone special.

Later, as a teenager and young adult, the fashion industry began to make clothes for my more-than-average frame. Unfortunately, the price tag affixed to those garments was beyond my meager budget.  The tops, pants, and dresses tended toward the matronly or the muumuu styles but nevertheless, I was finally able to wear “store-bought” clothes.

So here I am, a mature adult and my frame has not changed.  I am still larger than those original standard measurements that have not been updated since the later forties.  My clothing choices are more plentiful. There has recently been a revolution to acknowledge those who wear a size twelve or larger.  I applaud that movement.  I hope it gains more and more momentum.

The portion of my budget dedicated to clothing is not any greater than it was in my younger years, but I find I have a fabric stash, as do all sewists.  The temptation to walk into the sewing room, pick up an attractive yardage of fabric and craft a garment that fits me specifically in all the right places and is the right color or design for my body is a force that I cannot resist.  It feels good to finally have sewn enough that my skill level has progressed past beginner.  Many techniques are second nature.  Yes, I sew because I need it.  I need well-fitting clothing that suits my style and my pocketbook, as well as expresses my artistic personality and fulfills my need to work with my hands and craft something.

Sewing

Sewing and Perseverance

FullSizeRenderI have lived long enough on this earth to know that when I get the feeling that I am not of sound mind or body, I need to stop trying to sew.  I have learned that there are days to design, there are days to sew and there are days to just say no.  Adhering to this principle leads to a lot less frustration, tearing of hair, gnashing of teeth and spitting of curse words.  This shirt is an object lesson to this principle.

I have been sick since the beginning of November.  The kind of sick that one has where they really don’t feel good but they don’t feel bad enough to lie in bed or be hospitalized.  Nevertheless, I know I was off my game, and on some days out of my head.  I burnt baked goods that I have baked every Christmas for my adult life.  I put groceries in the wrong cabinets, couldn’t remember people’s names and totally forgot that I ever owned a particular vehicle.  None of this is like me at all.

Yet, during this “off time”, I was off on Christmas vacation and that has always meant prime sewing time.  Every day I went to the sewing room and tried to pick something up.  And every day I screwed it up so badly that I was too embarrassed to show anyone.  This shirt somehow survived that horrible time.

I have been looking for a simple basic bodice that will fit my extreme bust comfortably for quite some time with no luck. (See previous blogposts.)  I stumbled upon this B2104 Tailored shirt pattern from Fashion Patterns by Coni.  I traced off a straight 4X in hopes to make a muslin.  I struggle with making muslins. I always want to jump right to some fabric.  My mother shared a box of flannel with me.  The box had been purchased at a yard sale for a couple dollars and contained a wealth of thick cushy cotton flannel in yummy colors.  I instantly grabbed this blue and black piece and tried to cut out the shirt pieces.

I hesitate to write a review of this pattern owing to my recent lack of any semblance of a mind but let’s just say both the pattern and my skills have issues.  The problems with the pattern amount mostly to no more than some typos and some nearly accurate numbers and measurements.  The pattern called for over 5 yards of flannel and I was able to lay it out in 3.  I still am not sure how that happened but since, as you can see, the shirt does have all its parts, I’m not going to question it.

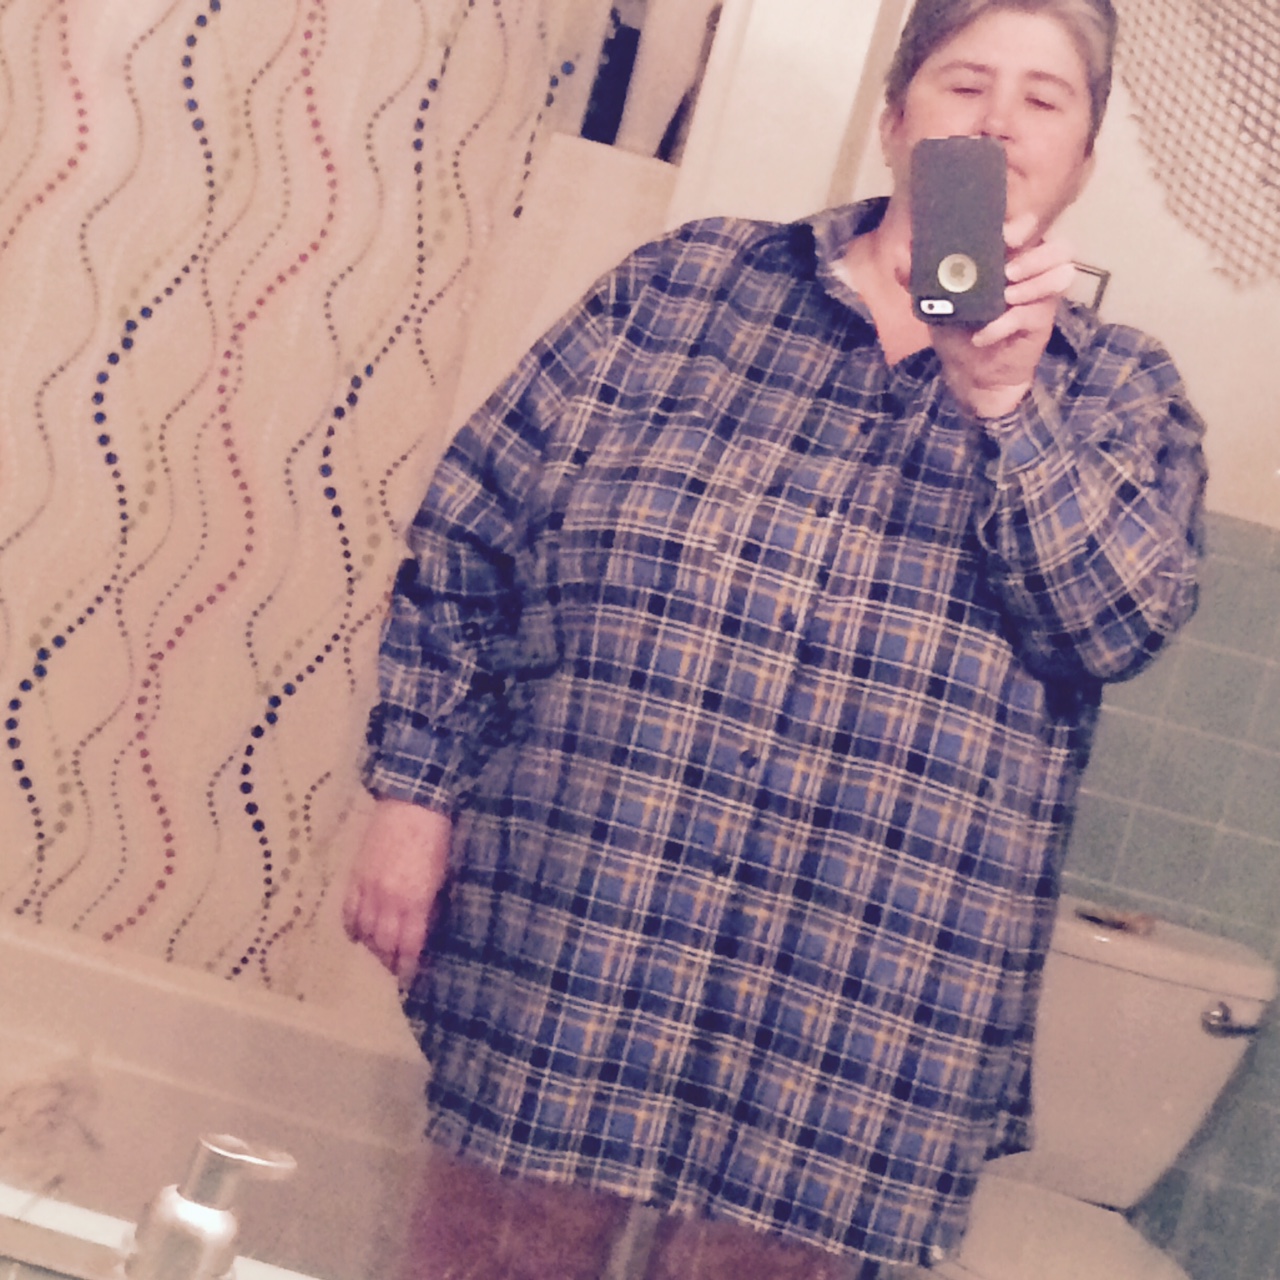
I did such a great job on this shirt.<sarcastic laugh>  Notice the near-perfectly matched plaids on the front bodice pieces and the pocket placement.  I made the most beautiful front plackets, then added and pressed the most elegant stand collar.  I was in love with the shirt.  So much so, that I bought a belt to match it and planned the leggings and boots to match.

Then I tried the shirt on.

There were the most oddly shaped humps above where my bust should be.  Round protrusions coming out of the armholes just even with where my cleavage started.  What the crap?

Then I discovered it.  I had sewn the right sleeve in the left front bodice and the left sleeve in the right front bodice.  My sleeve plackets and cuffs were really nice but now they lapped the wrong way.  I wish I could say I was horrified.  I wanted to bang my head against the wall,.

I let it lie for a couple days and then I realized.  Successful sewing is nothing but perseverance through adversity.  It forces anyone that thinks their work is perfect to come to the realization that maybe it is not the gift to the world they thought it was.  Sometimes bad things happen during construction and sometimes, as bad as we hate to admit it, we need to learn the patience to go back, rip out the wrong seams and re-sew them the correct way.

And yes, one learns that if you are a little off your game or if your sewing mo-jo has left the building—Stop, just stop!

Sewing

New Online Pattern Magazine from Collette Patterns

Collette Patterns is almost ready to roll out its new online digital pattern magazine. Use this link to get on their email list.

Seamwork from Collette Patterns

I’ve not been fortunate to use any of their patterns yet, especially the much-loved Moneta, but I hope to in the future.  And I’m very excited about the move to digital format in the pattern magazine world.  Finally, someone who gets “digital”.


Sewing

Epic Sewing Fails

IMG_2273.JPGI hate when this happens! I could sew every day for the rest of my life and I’m pretty sure I would spend one-third of my time making these knots or fixing these knots. But they have taught me one thing–patience.

Time was when I would toss a project aside at the first sign of this problem. I soon grew tired of tossing fabric and never completing anything. So I taught myself to not give up. Was it easy? No. Was it frustrating? Yes. Did I lose my temper? Yes. Some days I had to physically clinch all my muscles to keep myself at my sewing machine. I’ve even practiced deep breathing exercises.

Now, after years of knots, I have a personal rule. When this knot happens, unthread the machine then re-thread the machine. Take a deep breath and sew. And the third time this happens during one sitting, I acknowledge that the forces of sewing are not in my favor and I turn it off and do something else the rest of the day.

Do professionals have these problems? How much of their time do they lose on such things?

Sewing

Fitting Frustration

Does the quote “every man who is his own lawyer, has a fool for a client” apply to sewing garments for yourself?  Does any one that sews to fit themselves have a nitwit for a client? Maybe not all, but maybe those that have difficult body shapes to fit?  I’m beginning to feel like a fool, nitwit and idiot.

Disclaimer:  I feel I must state here that I have a shape that has an above-average degree of difficulty to fit.  (No hating, it is what it is.)

First, there was the green dress.  I chose Butterick 6033 because I really crave a dress.  I would love a simple dress with a little shaping. It needs to be something I can put together quickly in an easy-care woven fabric.  I’m not a fan of draping clingy knit on my body.  I chose the Connie Crawford’s because they are the only ones close to my RTW size of 4X (34-36W). I picked a sweet little print in a pale sage green.  I cut a 4X but used a pivot FBA to add an inch to the bust measurement in some vain effort to fit my DDD+ bust.  I’d show a picture of it but that dress and all photo evidence has been deleted from my life.  I stitched the dress up quickly and was hoping to wear it to my daughter’s wedding shower.  On the day of the shower, I was able to get the dress on.  There was more than enough ease under the arms but when my husband asked if the armholes were supposed to show on the front of my bust, I removed the dress and tossed it.

Next, there was the Pearl Snaps and Pivot FBA shirt. I used a menswear western shirt pattern that I had used in the past with good results.  I pivoted the pattern to allow for the FBA and produced a western shirt that I have worn and will wear again.  It does fit around the bust AND the hips.  It has a rather large blocky shape to it and I fear it does nothing for my figure.  It is a fun shirt that I wear line dancing so I will continue to wear it for the fun of it. But I have been reading all of the blogposts on fitting a curvy figure and I crave a better fit.

Then, there was the Killer Bees incident.  My husband found a new sporting goods store to visit in a nearby town and I rode along to get in some quality time with him and my latest knitting project.  I happened upon a Hancock Fabrics store and decided to run in.  Fleece was on a fabulous sale and sitting right at the front door.  A few yards of golden yellow jumped off the fabric table and followed me home.  Why golden yellow, you might ask?  My university’s colors are blue and gold so I envisioned a fleece vest or jacket in gold with a navy zipper and navy top-stitching.

Days passed and the more I thought about that fleece and my shape, the more I began to worry.  A mental image came to me one day of John Belushi in his Killer Bee costume from Saturday Night Live.  Would I really look like that, I thought.  With that in mind, I pressed on.  I used McCalls 5252, opting for view D, the hooded full-zip vest.  I used the XXXL size, split the yoke and spread it about an inch and increased the width of the underarm side panel piece.

The vest is finished. I may wear it, I may not.  It does in fact fit around me.  It does fit around my hips. It is long enough to cover my midriff excesses.  But the armholes are large enough I could pass a small child through them while I’m wearing the vest.  I have so much extra fabric and space in my shoulder area.  Three strikes and I feel that fitting clothes for myself seems an impossibility at this point.

Yesterday, I ran across The Truth About Fitting post by  on the Curvy Sewing Collective. The timing of Mary’s blogpost was perfect.  When the vest did not work out last night, I simply filed it away as a lesson learned.  I analyzed all three of my epic-fail sewing as I prepared to write this post, and have come to one conclusion.  Fitting yourself is hard for EVERY body. It is hard to do and it is hard to get right. Perfect fit is a very elusive creature. I think trying to fit something on yourself adds a whole degree of difficulty that we don’t take into consideration.

So, I will not give up!  I will continue to try, to persevere. I resolve to not use any more menswear or unisex patterns.  I will continue in the ongoing search for someone or some idea that will help me conquer an XL FBA.  It’s out there, I just need to find it.  Or am I the only one of this size out there?

Sewing

Ravelry for Sewers?

Ravelry buttonI’ve had a Ravelry profile for a while now but I only used Ravelry for searching for free patterns.  I’ve been inspired by some of their recent Unraveled blogposts to flesh out my profile and actually participate in the whole yarn community.  And let me just say, it is awesome!  The functionality of the entire website is outstanding!  The sewing community needs something like this desperately.  I wish there was some way that Ravelry would make the code open source and someone with a less than genius programming knowledge could go in and brand the site and get something rolling for sewists……….I would love to but I have a day job. LOL

Now that the dear daughter’s wedding is over, I can go back to some major sewing.  Thank goodness for yarn projects getting me through the stress of that event.

Sewing · Tools

DIY Pattern Weights

IMG_1625.JPGPinterest strikes again!  I’ve been noticing lots of pins with instructions on how to make your own pattern weights.  Pattern weights have always been a frivolous tool that never really found a place in my sewing tool budget.  Then, I saw the extremely large washers from a hardware store that appeared in my Pinterest feed one day.

Wow, what a great idea!  I wish I had thought of it.  Those washers were giant and would make perfect pattern weights, but were they available locally?  They look like washers that would fit on a oil tanker or dump truck with a hauling capacity about the size of a small town.  My husband was recounting his latest trip to his favorite farm and home store when I remembered to ask him if he had seen any large washers.  “Yes,” he announced confidently, “I know exactly where they are. I can show you.”  So on our next outing, I followed him into the store and he pointed out the variety of washers to me.  Yes, they did indeed have some extremely large ones.  The box said 1″, $1.99.  I was shocked at the price until my husband rolled his eyes and informed me, “That’s a pound, silly.”  I quickly selected eight, which I thought to be a reasonable number.  The eight washers weighed a little under one-and-a-half pounds and cost me a grand total of $3.39.

The shiny surface of the washers seemed to be slick and I was concerned that they would slip around on fabric and pattern paper.  I never miss a chance to decorate mundane things so I quickly whipped out a crochet hook and scrap ball of yarn.  Deep in my crafting memory, I remembered crocheting around canning jar rubber gaskets.  The same technique could be used to decorate these washers and give them a personality.  After a quick search of Pinterest for crochet edgings, I felt confident I could “dress” my washers and turn them into pattern weights that would be useful as well as attractive.

Once I got started, I couldn’t stop. I created 8 different designs.  I’ve included some rough pattern instructions below. (Be kind. This is my first time writing my patterns down.)

INSTRUCTIONS:  Using an H crochet hook and a ball of sport-weight worsted yarn, I started with a beginning loop on my hook and single crocheted all the way around the washer with a slip stitch in the beginning single crochet to end the round.

IMG_1623.JPGA:
Row 1: Single crochet around the washer until there are 40 single crochets.  Slip stitch to join.
Row 2:  Chain 2 for the first stitch and 4 double crochet in the same stitch.  Skip 1 stitch, single crochet in next stitch, skip 1 stitch. *5 double crochet in the next stitch, skip 1 stitch, single crochet in next stitch, skip 1 stitch. Repeat from * around. Join with slip stitch.

B:
Row 1: Repeat row 1 from A.
Row 2: Chain 1 for beginning stitch, *single crochet in next 3 stitches, chain 4, skip 1 stitch. Repeat from * around. Join to the beginning of the row with a slip stitch in beginning chain.
Row 3: Chain 1, skip 1st stitch, *single crochet in next stitch, skip next stitch, 8 single crochet in chain-4 space, skip next stitch.  Repeat from * around.  Join with slip stitch.,

C:
Row 1: Repeat row 1 from A.
Row 2: Chain 2, 3 double crochet in first stitch; chain 1, skip 3 stitches then 3 double crochet in next stitch (cluster). Chain 1, skip 3 stitches and cluster 3 more times. Chain 3 and 3 double crotchets in same stitch (corner made). Repeat sequence 3 more times to create a square effect. (Refer to photo for assistance in this one). Join with slip stitch.

D:
Row 1: Repeat row 1 from A.
Row 2: Chain 2 for beginning stitch, *2 double crochet in next stitch, 1 double crochet in next stitch. Repeat from * around. Join with slip stitch.
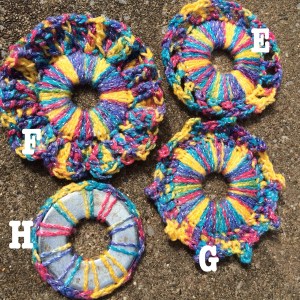
IMG_1624.JPGE:
Row 1: Repeat row 1 from A.
Row 2: Chain 2 for the beginning stitch, *double crochet in the next stitch, chain 2, skip next stitch.  Repeat from * around.  Join with slip stitch.

F:
Row 1: Repeat row 1 from A.
Row 2: Chain 1 for beginning stitch, single crochet in the next stitch, chain 3, slip stitch in the 1st chain made to create a picot, single crochet in the next two stitches. *Single crochet in the next 2 stitches, make a picot by chaining 3 and slip stitching in the first chain made then single crochet in the next 2 stitches.  Repeat from * around. Join with slip stitch.

G:
Row 1: Repeat row 1 from A.
Row 2: Chain 3 for beginning stitch, 6 triple crochets in the same stitch, skip *stitches.  *8 triple crochets in the next stitch, skip 2 stitches. Repeat from * around. Join with slip stitch.

H:
Row 1: *Single crochet in washer, chain 2. Repeat from * around 9 times. 10 single crochets total.  Join with slip stitch.

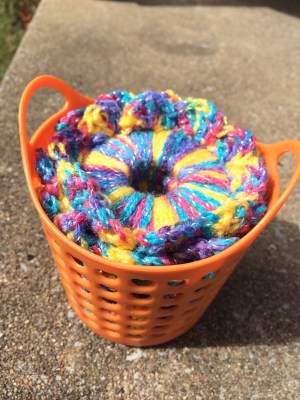
A great dollar store find works as a holder.
IMG_1613.JPG